
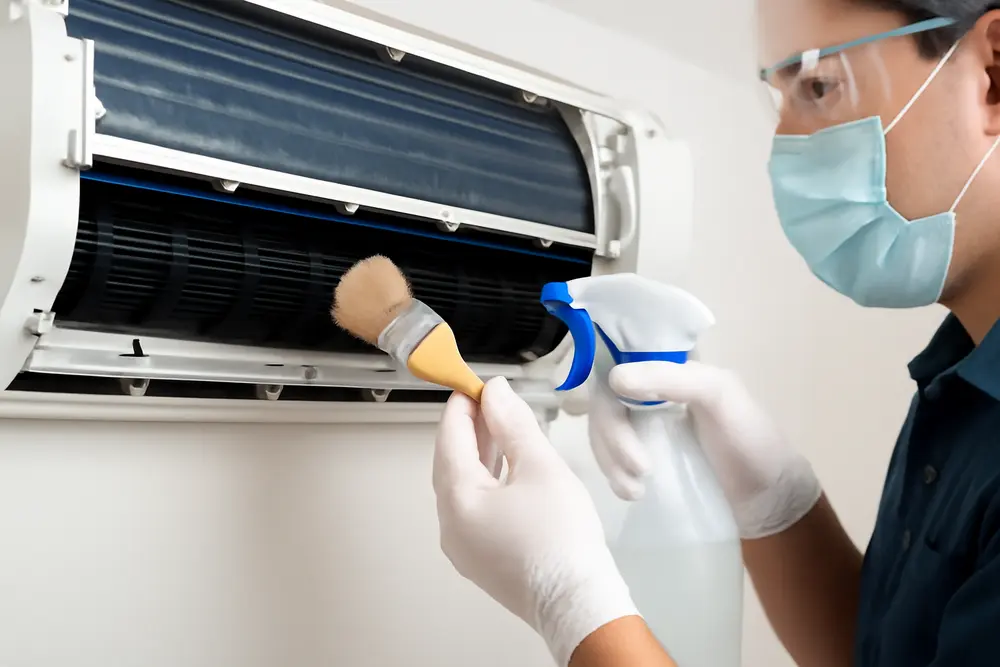
If your ductless mini-split smells like a wet gym bag forgot leg day, you’re not imagining things. Biofilm loves your indoor head. Every cooling cycle paints the evaporator coil with condensation, dust sticks to it, microbes move in, and the blower wheel flings that funky cocktail straight at your face. The fix is not a quick spritz of air freshener. You need to target the real growth zones inside the unit and clean them the right way without nuking your electronics or bending fins into spaghetti. Here’s how to handle evaporator coil sanitation, blower wheel disinfection, and a drain that thinks it’s a swamp, plus what you can safely DIY and when to call a pro before the mold decides to annex your drywall.
Why Mini-Splits Harbor Mold
Mini-splits are quiet, efficient, and sneaky. There’s no big duct network to catch your eye when it gets grimy. Everything happens in a compact indoor head that stays shaded, damp, and dusty. That is the perfect Airbnb for biofilm. The evaporator coil stays wet while it cools your air. The blower wheel sits inches away, picking up moisture and throwing it through a cozy, dark plastic housing. If the drain pan or condensate line is clogged, water stagnates and slime throws a whole party. If humidity in your home runs high or you leave the fan set to On, the coil never really dries. That keeps the film alive, sticky, and ready to trap even more dust, which then insulates the coil and ruins efficiency. You get odors, musty rooms, and a unit that works harder while giving you the side-eye.
What Needs Deep Cleaning
You are not trying to polish plastic. You are targeting the three biofilm hot zones that actually matter for health, airflow, and efficiency. Skip them and you’re just cleaning for Instagram.
Evaporator Coil Sanitation
The coil is the cold radiator behind the front panel. When it’s clean, air slides across aluminum fins and sheds heat fast. When it’s wearing a sweater of dust and slime, heat transfer tanks, condensate lingers, and microbes flourish. Proper evaporator coil sanitation focuses on removing soil and biofilm without damaging fins or electronics.
Safe approach for light to moderate buildup looks like this. Kill power at the breaker or disconnect so the fan cannot surprise you. Pop off the front cover and filters. Shield the control board and wiring with plastic. Use a no-rinse cleaner labeled for indoor evaporator coils, not an acid or caustic coil cleaner designed for rooftop units. Apply a light, even foam and give it a 5 to 10 minute dwell. Agitate gently with a soft fin brush in the direction of the fins. Rinse with a controlled low-pressure sprayer or squeeze bottle. Think garden mister, not pressure washer. Anything over roughly 100 psi can fold fins. If fins are already bent, a fin comb can straighten small areas. Never spray directly into the control board or motor housings and do not soak insulation.
Do not use household bleach. Chlorine eats aluminum and can create nasty fumes in a confined space. Bleach also does a poor job cutting through oily dust. You want a coil cleaner that lists HVAC evaporation coil use and either uses safe surfactants or a low-residue hydrogen peroxide formulation. The goal is physical removal of the film plus sanitation. A fragrance bomb is not a cleaning step.
Blower Wheel Disinfection
The blower wheel is the long hamster wheel that moves air. It is a biofilm magnet because every fin on that cylinder picks up condensate and dust spray from the coil. If you see gray or brown frosting on the fins, expect odor, reduced airflow, and extra noise. Blower wheel disinfection must get into those narrow fins. For mild buildup, you can clean in place with a mini-split cleaning bib to catch runoff, a mild coil-safe detergent, and detailing brushes or foam swabs. Rotate the wheel by hand while you work and keep water out of the motor. Follow with a low-pressure rinse and a sanitation step listed for HVAC components. Let it drain and dry thoroughly before restoring power.
For heavy buildup that looks like a chocolate croissant, removal is usually the only sane method. That means disassembling the fascia, louvers, and sometimes the coil frame to slide the wheel out without breaking the motor mount. If you are not comfortable tracking connectors, noting screw locations, and resealing the housing, call a pro. Pros will bench-clean the wheel, apply an EPA-registered disinfectant labeled for HVAC use with the proper dwell time, rinse, dry, and reassemble without snapping a fragile clip that the manufacturer stopped making in 2019.
Drain Pan and Line
Even a spotless coil will get slimy again if your drain pan and condensate line act like a kiddie pool. Check the pan channels and outlet for slime and scale. Clear debris with a brush and a mild cleaner, then a water rinse until you see free flow. To clear the condensate line, pull the exterior end and use a wet-dry vac to suck the line clean. You can also flush with warm water and a small dose of coil-safe cleaner. Avoid dumping straight bleach in the pan. It can corrode metals, wreck finishes, and the fumes are not friendly. If your line has a trap, make sure it primes properly. Insulate the line to prevent sweating and dripping in walls or attics. If you have a condensate pump, clean the reservoir and check the float switch so your line does not backlog and overflow into drywall at 2 a.m.
DIY Or Call a Pro?
You can do a surprising amount safely if you respect electricity, use the right chemicals, and take your time. But mini-splits pack a lot of parts into a shoebox. One wrong move and your Saturday turns into a warranty debate. Use this sanity check to pick your lane.
| Task | DIY Safe | Better For Pros |
|---|---|---|
| Wash reusable filters and front cover | Yes | No |
| Light evaporator coil sanitation with no-rinse cleaner | Yes, with power off and electronics covered | When fins are damaged or coil is heavily impacted |
| Mild blower wheel disinfection in place using a cleaning bib | Yes, if buildup is light and you can keep water off motors/boards | When fins are caked and wheel needs removal |
| Flush condensate line and wipe drain pan | Yes | When line is inaccessible or pan is cracked or holding water |
| Electrical troubleshooting, board removal, refrigerant issues | No | Yes, always |
| Persistent odors after cleaning or recurring growth | Try DIY once | Yes, indicates deeper contamination or installation issue |
A pro service is not just stronger chemicals. We use coil-safe detergents and disinfectants that are specifically labeled for HVAC use, controlled rinsing, containment to avoid aerosolizing spores into your room, and we actually pull the blower wheel when it needs it. We also check installation quirks that feed biofilm, like a level drain pan that should be sloped, a sagging line that holds water, or a system that is oversized and short-cycles so the coil stays wet and funky.
Prevention That Actually Works
Mold prevention is not a scented filter and a prayer. It is air, water, and time managed on your terms.
Keep indoor humidity between about 40 and 60 percent. Below that your sinuses complain, above that your coil becomes a slip-n-slide. If your climate is muggy or your house holds humidity like a sponge, run a dedicated dehumidifier in problem zones or use your mini-split dry mode. Dry mode runs the system to strip moisture and then ramps down to let the coil dry out. If your remote has only Auto and Cool, use Auto and avoid leaving the fan set to On. When the compressor is off and the fan keeps running, you blow warm room air over a wet coil and feed the biofilm buffet.
Maintain the drain. Once per cooling month, confirm that the line is dripping outside during operation. If not, you may have a clog forming. Vacuum the outside end with a wet-dry vac for 2 to 3 minutes. If you have a pump, clean its tank and make sure the float moves freely. Do not let algae set up shop.
Clean the reusable filters every two weeks during heavy use and replace disposable ones on schedule. Filters do not stop everything, but a loaded filter starves the coil for air, keeps it colder, and makes it sweat longer. That equals more moisture and more growth.
Plan internal cleanings. Pop the front panel and eyeball the coil and blower wheel twice a year. One check before cooling season, one before heating or dehumidifying season. Light sanitation before peak use keeps you out of the swamp category. If you are running the unit in a kitchen, workshop, or pet-heavy space, expect to clean more often because grease and fine dust stick like glue.
Watch the install. If the indoor head sits above a steamy shower or in the direct path of a cooking station, relocate or expect more maintenance. Ensure the wall sleeve is sealed, the condensate line has a gentle continuous slope, and the line is insulated where it runs through hot areas so it does not sweat inside a wall. If the unit short-cycles all the time and never dries out, you may be oversized. That is a conversation worth having if you are perpetually dealing with growth.
Step-By-Step Cleaning Game Plan
If you are tackling a light to moderate clean and you are handy, here is a practical blueprint that will not end with you shopping for a new indoor head.
- Shut off power at the disconnect or breaker. Confirm the display is dead. The unit should not respond to the remote.
- Lay a mini-split cleaning bib or towels under the unit. You will get runoff. Protect your wall and floor.
- Remove the front panel and washable filters. Wash filters with mild dish soap and warm water. Let them dry fully.
- Cover the control board and any exposed wiring with plastic film. Painter’s tape is your friend here.
- Spray an indoor coil cleaner on the evaporator coil fins. Start at the top and allow 5 to 10 minutes of dwell. Agitate gently with a soft brush in the direction of the fins.
- Rinse with a low-pressure sprayer or squeeze bottle. Let the foam and rinse drain into the pan and out the line.
- For blower wheel disinfection in place, rotate the wheel slowly and apply cleaner to the fin edges using a foam swab or soft brush. Keep spray away from the motor shaft and bearings. Rinse modestly and allow drainage.
- Vacuum the exterior end of the condensate line with a wet-dry vac for a couple of minutes. If accessible, flush a cup or two of warm water through the pan outlet to confirm flow.
- Wipe the louvers and housing with a coil-safe cleaner. Do not flood any moving parts. Replace the filters and reassemble the panel.
- Let the unit sit for 30 to 60 minutes so residual moisture can drain. Restore power and run in dry mode for 20 to 30 minutes to finish the dry-out.
Gear checklist that actually fits in a tote bag. Nitrile gloves, safety glasses, N95 or better if growth is heavy, soft fin brush, foam swabs, no-rinse indoor coil cleaner, plastic sheeting and tape, cleaning bib or towels, wet-dry vac, low-pressure sprayer or squeeze bottle, and a fin comb if you find a mashed section. Leave pressure washers, bleach, and random internet potions out of this party.
Mini-Split Mold FAQ
Why does my mini-split smell like dirty socks?
That classic dirty sock stink comes from microbial growth on a damp evaporator coil and blower wheel. When the coil never fully dries, bacteria and mold produce funky volatile compounds that hit your nose the second the fan ramps up. Cleaning the coil and wheel plus running dry mode after cooling usually fixes it.
Can I just spray disinfectant into the inlet and call it done?
Spraying a room disinfectant at the inlet masks odor but leaves biofilm glued to the coil and blower. You need physical removal plus a product labeled for HVAC use with proper dwell time. Otherwise, you are cologne on a skunk.
Is steam safe for the coil?
Controlled low-temp steam can work in trained hands, but too hot or too close can warp plastic and lift coil coatings. Most homeowners do better with a coil-safe detergent and a gentle rinse. If you want steam, hire a tech who does it regularly and protects electronics.
Will UV lights stop mini-split mold?
UV-C can help on some systems, but mini-split heads are tight on space and full of plastic. Wrong placement can fade plastics and miss the blower wheel entirely. If you go UV, use a kit made for ductless units and keep cleaning on the schedule. UV is assistive, not a hall pass to skip maintenance.
How often should I schedule evaporator coil sanitation?
Inspect twice a year and sanitize as needed. Many homes only need a light clean annually before cooling season. Kitchens, workshops, pet zones, and humid climates usually need more frequent attention. If you smell mustiness or see slime on the blower fins, it is time.
What chemicals should I avoid?
Avoid bleach, strong acids, strong alkalis, and any cleaner not labeled for indoor evaporator coils. Avoid high-residue products that leave sticky films because they make dust stick faster. Also skip oily fragrances that just perfume the problem.
Why does mold keep coming back?
Recurring growth usually means the root cause is still there. High indoor humidity, a drain that holds water, a fan left on continuously, or an oversized unit that short-cycles will keep the coil wet. Fix the moisture, then clean, and it sticks.
When Mold Spreads Past the Unit
Sometimes the first clue is a water stain under the head or paint that bubbles like a bad latte. A clogged condensate line or cracked pan can dribble into drywall and framing. If you see staining, soft drywall, or recurring musty odor outside the unit, you are dealing with more than a dirty coil. That is where we come in. At Austin Hi-Tech Restoration, we do the unglamorous work other folks avoid. We locate hidden moisture, set containment so you are not breathing airborne junk, remove damaged materials, clean the structure with HEPA filtration and targeted disinfectants, and coordinate a proper co-clean with your HVAC service so the source is handled. If your mini-split biofilm has upgraded from nuisance to house guest, we will evict it and fix the mess it made.
If you want a reality check on whether your buildup is DIY-level or a pull-and-clean job, send us a photo of the coil and blower fins with the panel off. We will tell you straight. No scare tactics, no glitter promises, just what it takes to make your air not smell like a locker room and your unit run the way it should.