
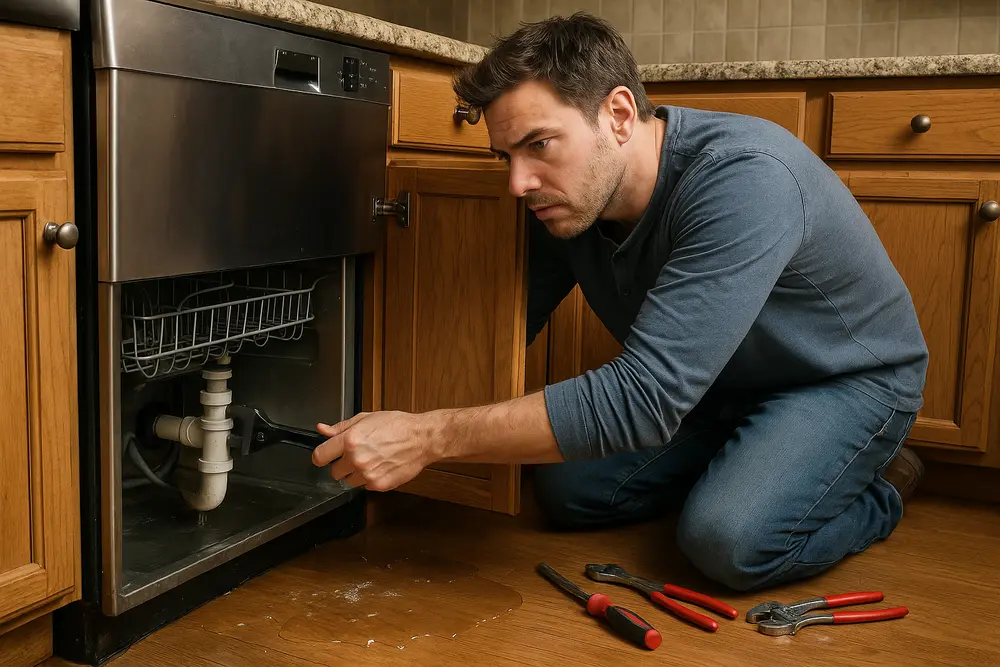
A dishwasher leak under cabinets can spread well beyond the puddle you can see. Water may soak the unfinished edges of cabinet panels, slip beneath flooring, collect around fasteners, and wet the subfloor without making much of a scene. Wiping the floor is a start, but it isn’t proof that the cabinet cavity is dry. The reliable approach is to stop the source, expose hidden areas, measure the moisture, dry each affected layer, and verify the results.
What to Do When a Dishwasher Leaks
Start with safety rather than leak detective work. Cancel the dishwasher cycle and keep people and pets away from the wet area. If you can reach the dishwasher’s water-supply valve from a dry location, close it. The valve is commonly inside the sink cabinet, although some installations put it elsewhere.
Turn off the dishwasher circuit at the breaker if you can do so safely from a dry location. Don’t touch a wet plug, cord, outlet, junction box, or appliance frame. Water near electricity isn’t the moment to test your confidence with a screwdriver. If standing water has reached electrical components or you can’t access the breaker safely, call an electrician or emergency restoration professional.
Remove accessible standing water with towels, a mop, a squeegee, or a wet/dry vacuum rated for liquid pickup. Never use an ordinary household vacuum. Extraction is faster and more effective than asking a box fan to evaporate a puddle.
Photograph the appliance opening, flooring, toe kicks, adjacent cabinets, and any damage below the kitchen. These photos may help with repairs, an insurance claim, or tracking whether staining and swelling are getting worse.
Where Dishwasher Leaks Usually Start
Where water appears isn’t necessarily where it started. It can follow the dishwasher frame, travel along a hose, run beneath a floating floor, or emerge from the toe kick several feet away. Leak timing offers useful clues, but it isn’t a substitute for inspecting the connections and appliance.
| When Water Appears | Possible Sources |
|---|---|
| When the dishwasher is off | Supply valve, pressurized supply line, inlet connection, refrigerator line, or nearby sink plumbing |
| During filling | Inlet valve, fill connection, supply tubing, or an overfilling problem |
| During washing | Door gasket, spray arm, excess suds, tub, sump, circulation pump, or pump seal |
| During draining | Drain hose, clamp, disposal connection, air gap, tailpiece, or backed-up sink drain |
| After several cycles | Slow seepage, intermittent fitting failure, condensation, or trapped water finally reaching a visible edge |
Supply Lines and Inlet Connections
A dishwasher supply line remains under pressure even when the appliance isn’t running. A leak that continues while the dishwasher is off may come from the shutoff valve, the connection at that valve, the supply tubing, or the dishwasher’s inlet-valve connection. Corrosion, kinks, loose fittings, and cracked tubing deserve attention.
Don’t overlook other pressurized lines in the same cabinet run. A refrigerator supply line routed behind the cabinets can produce a convincing dishwasher impersonation.
Drain Hoses and Disposal Connections
A leak that appears during draining often points toward the drain hose, hose clamps, garbage-disposal connection, sink tailpiece, or air gap. Dishwasher discharge can contain detergent, grease, food residue, and microorganisms, so it deserves more caution than a fresh supply-line leak.
A backed-up sink or disposal can also force water through weak drain connections. Fixing a loose clamp won’t solve much if a blocked drain keeps creating pressure where it shouldn’t.
Door, Spray, and Wash-Cycle Problems
A dirty or displaced gasket can leak, but don’t automatically buy a new seal because water appeared at one corner of the door. A cracked or obstructed spray arm can direct water toward the door. An unlevel dishwasher, debris along the seal, a door-alignment issue, or the wrong detergent can also cause leakage.
Dish soap is especially good at turning a dishwasher into a foam machine. Excess suds can escape through areas that hold water perfectly well during normal operation. Use detergent made for automatic dishwashers and follow the appliance manufacturer’s instructions.
Pumps, Sumps, and Tub Components
Leaks beneath the center of the appliance may involve the sump, circulation assembly, pump seal, tub, or internal hose connections. These failures can be difficult to see without removing the lower access panel or pulling the dishwasher. Turn off power before opening an access panel, and leave appliance disassembly to a qualified technician when the source isn’t readily accessible.
Nearby Plumbing
Inspect the faucet connections, sink drain, disposal, sink rim, counter joint, and plumbing inside a shared wall. Water from a loose faucet connection can run along the bottom of the sink cabinet and disappear beneath the dishwasher. Blaming the nearest appliance is understandable, but water isn’t interested in making diagnosis convenient.
How to Find Water Under Cabinets
Begin behind the dishwasher’s removable lower access panel if it can be opened safely with the power off. Use a flashlight to inspect the floor, frame, supply connection, drain route, and nearby cabinet edges. Rust, mineral deposits, dark staining, softened wood, or a clean trail through dusty material can point toward repeated leakage.
Empty the sink cabinet and inspect its floor, back corners, pipe penetrations, and unfinished panel edges. Continue through adjacent base cabinets. Pay close attention to the side panel next to the dishwasher and the bottom edges of particleboard panels. A finished face may look respectable while the unfinished underside resembles soggy breakfast cereal.
Removable toe-kick covers can provide access beneath several cabinets. Don’t drill blindly into toe kicks, floors, or walls. Electrical wiring, plumbing, fasteners, and structural components may be hidden behind them. If the toe kick isn’t designed for easy removal, selective access is better handled by someone who knows what’s behind the panel.
If the kitchen is above a basement or crawlspace, inspect from below. Look for dark subfloor areas, damp insulation, staining around penetrations, dripping fasteners, swollen panel seams, or water on framing. A lower view can reveal migration that isn’t visible through finished flooring.
Pulling a built-in dishwasher may expose the wettest area, but it has risks. The unit may be hardwired, secured to cabinets or the countertop, connected with short hoses, or trapped by swollen flooring. It can tip when moved. Professional removal is sensible when electrical connections are uncertain, stone counters are involved, or the appliance won’t slide freely.
Signs of Hidden Cabinet Damage
Cabinet water damage tends to show up first at seams, unfinished edges, fasteners, and low spots. Look for darkened panels, peeling veneer, bubbling laminate, swollen edges, rusted screws, loose face-frame joints, drawers that rub, and doors that no longer align. A musty odor is another warning that moisture may still be trapped.
Material type makes a major difference. Solid wood may swell and later shrink as it dries. Structurally sound plywood can sometimes be restored if its layers stay bonded. Particleboard and medium-density fiberboard are far less forgiving. They often swell, soften, crumble, or lose their ability to hold fasteners after substantial wetting.
The USDA Wood Handbook explains how moisture affects wood movement, strength, and fungal decay. The practical lesson is simple. A material can become dry and still remain damaged. Lower meter readings won’t glue delaminated plywood back together or restore strength to crumbling particleboard.
Check Flooring and the Subfloor
Water can move through laminate joints, flooring transitions, pipe openings, gaps at walls, and the perimeter of the dishwasher opening. It can also become trapped between sheet vinyl and underlayment, beneath floating flooring and foam pad, or between tile underlayment and the structural subfloor.
Inspect finished flooring for raised laminate seams, loose resilient flooring, warped boards, cupping, staining, discolored grout, hollow or loose tile, and movement near transitions. These signs don’t automatically prove the subfloor has failed, but they justify a closer moisture inspection.
A wet subfloor may show edge swelling, raised fastener heads, flaking OSB strands, delamination, discoloration, odor, or softness under normal foot pressure. Don’t jump on a suspected weak spot to test it. If the floor feels soft, sags, or deflects unexpectedly, limit traffic and have it evaluated.
Water beneath low-permeance flooring can remain after the exposed surface feels dry. The Building America Solution Center emphasizes controlling the source, giving wet assemblies a path to dry, and avoiding conditions that trap moisture. In some kitchens, that means access from below or selective flooring removal rather than a fan pointed at the top.
Using Moisture Meters Correctly
A moisture meter is more useful than pressing your palm against the flooring and declaring victory. Still, meters have limitations, and a random number without context can be misleading.
Pin-Type Meters
A pin-type meter measures at the points where its pins enter the material. It can help compare locations or depths in wood and wood-based products. Readings may be affected by material species, temperature, salts, meter settings, and nearby metal. The pins also leave small holes.
Pinless Meters
A pinless meter scans a broader area without puncturing the finish. It’s useful for finding relative differences and mapping how far a wet area may extend. Density changes, pipes, metal fasteners, depth, and layered materials can affect the result. An elevated reading may indicate moisture somewhere in the assembly without identifying the exact wet layer.
Thermal Cameras
An infrared camera displays surface-temperature patterns. It doesn’t detect water directly. Evaporation can make a wet area appear cooler, but air-conditioning, plumbing, air leaks, reflections, missing insulation, and material changes can create similar patterns. Confirm thermal findings with a moisture meter and physical inspection.
Building a Moisture Map
Take reference readings from similar, unaffected material. For example, compare the subfloor near the dishwasher with the same subfloor in a dry part of the kitchen or an adjacent room. Record the location, date, time, material, meter setting, and reading. Marking a small grid helps you return to the same locations each day.
Don’t rely on one universal moisture percentage for every cabinet and subfloor. Drying goals depend on the material, meter, indoor conditions, and suitable dry references. Progress should show repeated readings moving toward comparable unaffected materials, with no concealed wet layer left behind.
Subfloor Drying Techniques
Effective subfloor drying techniques begin with repairing or isolating the leak. Drying equipment can’t outwork an open supply connection, a split drain hose, or a dishwasher that continues leaking during every cycle.
Extract Water Before Evaporating It
Remove liquid water from the appliance opening, cabinet cavities, flooring seams, and accessible low spots. Towels and a wet/dry vacuum may be enough for a small loss. Professional extraction is more appropriate when water has spread beneath several cabinets, through a floating floor, or into the room below.
Extraction does in minutes what evaporation may take much longer to accomplish. Skipping it and setting out a fan is like drying a bathtub with a hair dryer while the drain plug is still in.
Expose Wet Surfaces
Open cabinet doors and drawers, remove wet shelf liners, detach removable toe kicks, and take off the dishwasher’s lower panel when it’s safe. Remove baseboard only when necessary and with care. Access from a basement or crawlspace may provide a less destructive drying route.
If flooring or a cabinet base traps water against the subfloor, selective removal may be required. Sheet vinyl, laminate, foam underlayment, luxury vinyl plank, and some engineered flooring can sharply limit drying from above. Don’t reinstall flooring until the subfloor and surrounding cabinet materials have been verified as dry and stable.
Control Airflow and Humidity
Position air movers so air passes across exposed wet surfaces rather than merely circulating around the kitchen. Airflow should reach the dishwasher opening, exposed toe-kick cavity, and other accessible wet materials. Don’t aim high-powered airflow at visible mold or contaminated debris because it can spread spores and particles.
Use dehumidification to remove water vapor released by drying materials. Opening windows isn’t automatically helpful, especially during humid Austin weather. If outdoor air contains more moisture than conditioned indoor air, open windows can slow the job. Air-conditioning and dehumidification are often more dependable.
The professional framework described by ANSI/IICRC S500 includes source correction, extraction, exposure, moisture mapping, controlled drying, repeated monitoring, and verification. That’s why structural drying involves more than leaving a household fan beside the dishwasher for a weekend.
Monitor the Same Areas Repeatedly
Check moisture readings, indoor relative humidity, odor, swelling, and material condition throughout drying. Readings should generally decline as wet materials release moisture. If they stall, a hidden layer may still be trapped or the equipment may not be controlling humidity effectively.
Drying should continue according to measured conditions rather than an arbitrary number of hours. If moisture isn’t declining, more access, stronger dehumidification, professional extraction, or material removal may be necessary.
What Can Be Dried or Saved?
Structurally sound solid wood, intact plywood, framing, some subfloor panels, nonporous hardware, and hard finishes may be salvageable when they’re cleaned appropriately and dried promptly. Tile may remain usable, but the underlayment and subfloor beneath it must also be evaluated.
Swollen particleboard, soft MDF, delaminated plywood, saturated fiberboard, wet absorbent shelf liners, damaged insulation, and underlayment trapped beneath flooring are harder to restore. Replacement is often the better answer when a panel is permanently swollen, buckled, crumbly, moldy, or unable to hold a fastener.
OSB deserves a close look at its edges and seams. It may dry successfully when wetting is limited and the panel remains firm, flat, and structurally sound. Severe edge swelling, flaking strands, deformation, or loss of stiffness can make replacement necessary.
Water source matters too. Fresh supply water may begin relatively clean, but it can pick up dirt and contaminants as it moves through cabinet cavities and flooring. Dishwasher drain water can contain food, grease, detergent, and microorganisms. Porous materials exposed to discharge water may not be good candidates for simple drying and reuse.
How Long Does a Wet Subfloor Take to Dry?
There’s no reliable universal drying time. A small supply-line drip discovered quickly isn’t the same as several drain cycles released beneath floating flooring. Drying duration depends on the water volume, subfloor material, flooring layers, humidity, temperature, access, air movement, dehumidification, and how long the material stayed wet.
The visible surface may feel dry while the underside of the subfloor, panel seams, foam pad, or cabinet base remains damp. Repeated moisture measurements, comparison with unaffected materials, and inspection of hidden layers should determine when drying is complete.
The EPA recommends drying wet materials within 24 to 48 hours to help reduce the risk of mold growth. That doesn’t mean mold starts on a stopwatch at hour 24. Temperature, humidity, material type, cleanliness, prior contamination, and airflow all affect growth.
What to Do if You Find Mold
Correct the leak before cleaning mold. Otherwise, it’ll return and make the fresh caulk or paint look foolish. The EPA advises cleaning hard surfaces with water and detergent and drying them completely. Moldy absorbent materials can be difficult or impossible to clean fully and may need replacement.
Wear appropriate gloves and eye protection, and avoid aggressively sanding, cutting, or disturbing moldy panels. Don’t direct fans at visible growth before the area has been assessed. Painting or caulking over mold doesn’t correct the moisture source or remove contaminated material.
The CDC notes that damp and moldy environments can cause symptoms such as coughing, wheezing, eye irritation, skin irritation, and a stuffy nose. People with asthma, mold allergies, chronic lung disease, or weakened immune systems may be more vulnerable.
Professional mold help is appropriate when growth extends into inaccessible cavities, keeps returning, involves a substantial area, or would require extensive demolition. Exact mold species and color usually don’t change the immediate priorities, which are stopping moisture, limiting exposure, removing affected material when needed, and drying the structure.
When to Call the Right Professional
A plumber or appliance technician repairs the leak source. An electrician handles wet wiring, outlets, junction boxes, or electrical components. A restoration contractor evaluates water migration, extracts water, exposes concealed areas, dries building materials, and documents moisture progress. Those jobs can overlap, but they aren’t interchangeable.
Call for help when the supply valve won’t close, water continues while the dishwasher is off, the source can’t be identified, or water has reached wiring. Professional assessment is also appropriate when flooring traps water across a broad area, several cabinets are affected, a ceiling below is wet or bulging, or the subfloor is soft, sagging, or delaminated.
Don’t wait if drain water or a sink backup is involved, mold is hidden or extensive, occupants have significant respiratory or immune-system concerns, or moisture readings aren’t declining. Cabinet removal, flooring demolition, and difficult dishwasher extraction also tend to go better with trained help and proper documentation.
For local information or to verify available restoration services, visit Austin Hi-Tech Restoration. If you’re filing an insurance claim, photograph conditions before removal and keep a dated record of moisture readings, equipment use, and damaged materials.
Preventing Another Dishwasher Leak
Inspect the supply hose, shutoff valve, drain hose, clamps, and sink connections periodically. Follow the dishwasher manufacturer’s guidance for hose inspection and replacement. A connection doesn’t need to be spraying water to deserve attention. Corrosion, abrasion, cracking, and mineral deposits can warn of a developing failure.
Keep the dishwasher filter and drain path clean, use only automatic dishwasher detergent, and investigate unusual sounds, repeated drain errors, odors, or unexplained flooring changes. Avoid running the appliance while everyone is asleep or away from home. A slow leak is much easier to limit when someone is present to shut it down.
Place a water-leak alarm beneath the sink or beside the dishwasher where leaking water is likely to reach it. Some automatic shutoff devices can close the water supply when a sensor detects moisture. No gadget replaces maintenance, but a loud alarm is considerably more useful than learning about a hidden dishwasher leak under cabinets from swollen flooring six weeks later.