
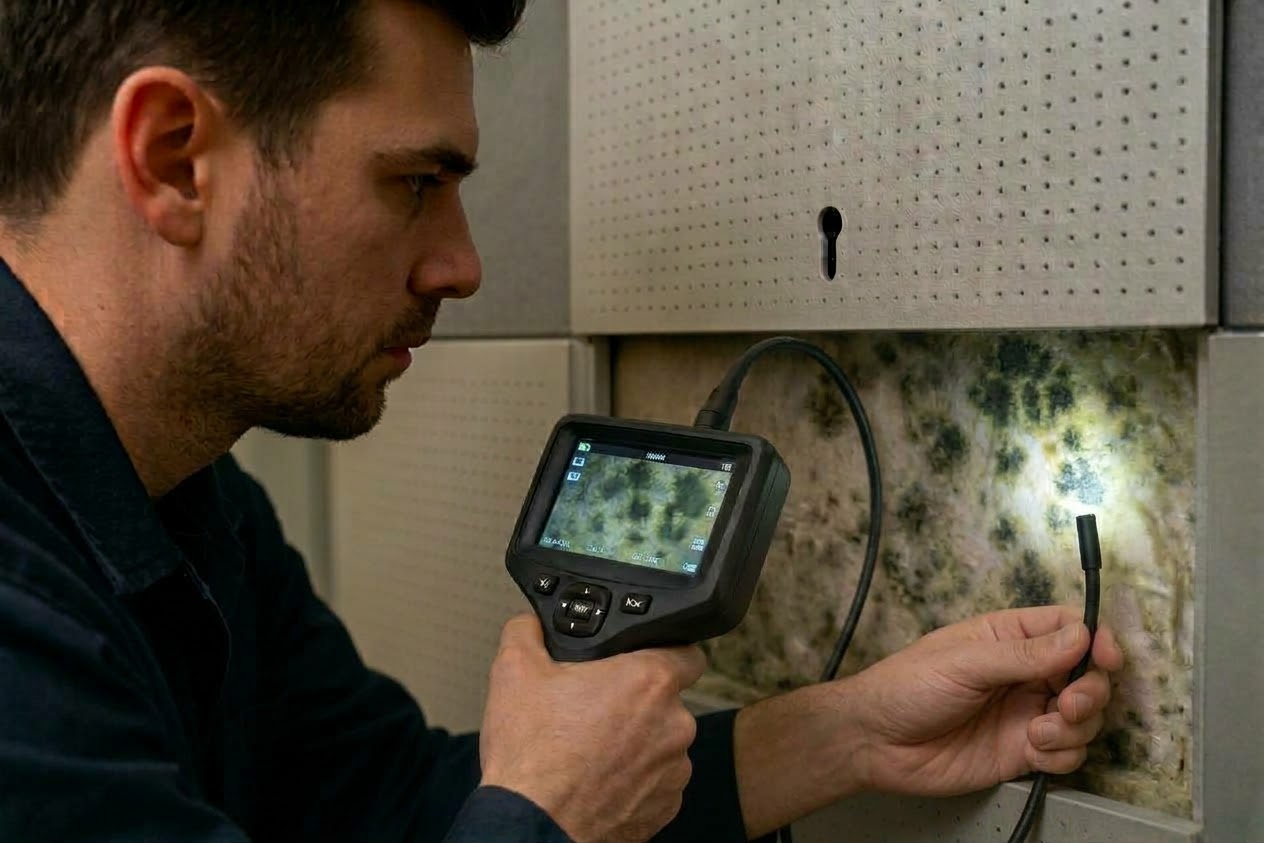
A borescope can make a suspicious wall less mysterious without turning the room into a demolition project. When a musty odor, edge staining, or damp adhesive points toward acoustic panel mold, a small camera may reveal what’s happening between the panel and the wall. It’s useful evidence, but it isn’t a mold laboratory, moisture meter, or crystal ball. Because no project photographs or measurements were supplied for this article, the inspection examples below are representative rather than descriptions of a specific property.
Why Mold Hides Behind Acoustic Panels
Acoustic panels don’t manufacture mold. Moisture is the real troublemaker. When water or humid air reaches a cool concealed surface and that surface can’t dry, mold may grow on the panel, wall, adhesive, framing, or ordinary dust trapped between them.
The term “acoustic panel” covers several different products. Fabric-wrapped fiberglass, mineral-wool panels, open-cell foam, polyester felt, wood-fiber tiles, perforated wood, and paper-based panels can all behave differently when wet. Some products primarily control echoes and reverberation inside a room. That’s acoustic treatment. Soundproofing is meant to reduce sound transmission through a building assembly. The terms are often swapped online, but they’re not identical.
Even a panel marketed as mold-resistant isn’t a force field. An inorganic core might not provide much food for growth, but its fabric facing, paper backing, adhesive, wood frame, and accumulated dust can. Paper-faced drywall behind the panel is another common target.
Moisture can arrive from a roof leak, a window flashing defect, a plumbing line, exterior masonry, or an air-conditioning problem. It can also be present before the panels are installed. Gluing a panel to drywall that hasn’t dried after painting, water damage, or construction is an excellent way to preserve a problem where nobody can see it.
How Condensation Forms Behind Panels
Condensation is a surface-temperature problem. It develops when a surface reaches or falls below the dew point of the surrounding air. An exterior wall behind a thick panel may be considerably cooler than the room, especially near concrete, metal framing, wall studs, or poorly insulated sections.
For example, a recording room might be maintained at 74 degrees with indoor relative humidity that doesn’t look alarming on a wall-mounted display. Yet a section of exterior concrete behind a fabric panel could still be cold enough for condensation. One acceptable room reading doesn’t prove that every concealed surface is dry.
Thermal bridging can make the pattern surprisingly specific. Suspected growth might follow metal studs, cluster beneath a window, or appear only along the bottom of a masonry wall. A leaking supply duct can create another localized cold spot. In those cases, wiping the panel face and lowering the thermostat won’t correct the wall assembly.
Building Science Corporation’s guidance on vapor control explains why wall assemblies need an appropriate path for drying. Installing plastic sheeting or a vapor-retarding coating on the room side isn’t a universal cure. Depending on the climate and wall design, that change could trap moisture instead of releasing it.
Poor Airflow Isn’t the Whole Story
Restricted airflow doesn’t create mold by itself. The more accurate explanation is that limited drying potential allows moisture to remain longer. A tightly glued panel can slow drying, but randomly adding an air gap or venting the cavity isn’t automatically the answer. Feeding humid indoor or outdoor air behind a cold panel could make condensation worse.
Air leakage and vapor diffusion also aren’t the same thing. Vapor diffusion is moisture moving through a material. Air transport occurs when humid air travels through openings such as outlet penetrations, ceiling joints, window perimeters, cable holes, and gaps around mounting hardware. Air movement through a small crack can transport much more moisture than diffusion through an intact painted wall.
Imagine a fabric-wrapped panel installed below a window. Humid air slips through an unsealed gap at the window perimeter and reaches cold sheathing. The panel blocks visual inspection and reduces drying toward the room. Mold appears behind the panel, but the panel isn’t the original source. Replacing it without repairing the window connection buys a fresh panel for the same old leak.
The EPA’s moisture-control guidance recommends treating moisture as a building issue involving bulk water, condensation, plumbing, drainage, and HVAC operation. That source-first approach matters because cosmetic cleaning won’t stop recurrence.
Signs of Hidden Acoustic Panel Mold
Hidden growth doesn’t always announce itself with a dramatic black patch. Often, the first clue is a stale or musty odor that becomes stronger near one panel. The smell may intensify after rain, during humid weather, or when the HVAC system has been off.
- Discoloration around panel edges, seams, outlets, or mounting points
- Peeling fabric, failing adhesive, or panels pulling away from the wall
- Warping, swelling, soft drywall, or crumbling panel backing
- Condensation on nearby windows, pipes, diffusers, or wall surfaces
- Recurring paint damage or staining below a window or roof transition
- Rusty mounting hardware or corrosion near the panel
- Elevated moisture-meter readings compared with a known dry area
These signs justify investigation, but none proves mold species or toxicity. Brown staining may come from water, adhesive, rust, or material breakdown. White deposits on masonry might be mineral efflorescence. Professionals should describe an uncertain camera image as “suspected microbial growth” or “mold-like growth” until it’s properly evaluated.
What a Borescope May Reveal
A representative inspection might begin with a musty odor near panels mounted on an exterior wall. The inspector would document the room conditions, compare moisture readings, and examine the wall with thermal imaging. If those checks support further investigation, a small access point could provide a camera view behind the panel without immediately removing a large section.
The borescope might show irregular surface discoloration, droplets, damp adhesive, water stains, delaminated drywall paper, compressed insulation, or corroded fasteners. It can also expose gaps around penetrations or cracks that deserve closer investigation. Seeing a tide mark below a window, for instance, may shift attention toward bulk water intrusion rather than condensation.
That initial view is best treated as a scouting report. If one opening shows damaged drywall paper, several additional observations or controlled panel removal may be needed to map the affected area. A camera view taken near the bottom of a six-foot panel tells us very little about conditions at the top.
What the camera can show includes staining, droplets, deterioration, corrosion, gaps, and suspected growth.
What it can’t show includes mold species, toxicity, exact moisture content, the entire affected area, or a verified moisture source.
What a Borescope Can’t Prove
A borescope inspection can capture a useful image, but a photograph of dark material isn’t a species identification. Color doesn’t tell us whether growth is dangerous, and the phrase “toxic black mold” shouldn’t be assigned to something based on a tiny camera image.
The camera also can’t measure how wet drywall, wood, or insulation is. That requires appropriate moisture instruments and an understanding of what their readings mean. Some meters report a relative scale rather than an actual moisture percentage, so publishing a number without naming the meter, mode, and tested material can be misleading.
Thermal imaging has similar boundaries. It shows surface-temperature differences, not mold. A cool area could reflect missing insulation, evaporative cooling, duct leakage, thermal bridging, or moisture. The image helps direct further inspection, but it doesn’t settle the diagnosis.
A clear view through one opening doesn’t certify that the wall is clean. The camera may be facing the back of a stud while contamination sits several inches away. Insulation can block the lens, and panel adhesive can create isolated pockets. Multiple checks and controlled removal are sometimes unavoidable.
Routine mold sampling isn’t always needed when visible growth and moisture damage already show that cleanup is required. The EPA’s mold-testing guidance explains that there are no federal airborne-mold limits establishing a universally safe or unsafe concentration. Sampling is more useful when the source is unclear, documentation is required, or a professional protocol calls for it.
A Safer Borescope Inspection
Drilling blindly into a wall isn’t an inspection technique. It’s a quick way to meet a water line, energized cable, gas line, fire-protection component, or duct that didn’t need a hole in it. Existing safe access should be used when possible. A removable panel is often a better option than drilling through the wall.
Start With Noninvasive Checks
Before creating an opening, document odors, staining, panel condition, recent leaks, and the wall’s relationship to exterior features. Record indoor temperature and relative humidity. Screen accessible surfaces with the correct moisture meter and compare suspect readings with a similar dry location. Infrared imaging may help locate temperature anomalies, but it shouldn’t be labeled a mold detector.
Older properties need extra caution. Paint, wall texture, adhesive, backing, insulation, and other building materials may contain lead or asbestos. Those hazards should be considered before cutting or drilling, not after debris is scattered across a studio desk.
Choose Access Carefully
The smallest practical access point should be selected only after utilities and other concealed hazards have been evaluated. A camera shouldn’t be casually pushed through an electrical outlet. Turning off one breaker doesn’t guarantee that every wire behind the wall is de-energized, and access near electrical components belongs in qualified hands.
During the inspection, the operator should record the direction and distance of the probe. Wide views establish location, while close views document material condition. Larger walls may require more than one access point, especially when the evidence doesn’t follow a clear pattern.
Know When to Stop
Gloves, eye protection, and respiratory protection should match the anticipated exposure. The probe shouldn’t be forced through insulation or used to scrape questionable growth. Investigation should stop when it reveals extensive contamination, active water, sewage, damaged wiring, or deteriorated structural materials.
The EPA’s guidance on hidden mold warns that opening concealed assemblies can disturb contamination and release particles into occupied air. That’s why ripping a panel off the wall to “see what happens” is a poor experiment. If the panel is contaminated, the answer may arrive in a cloud.
After the camera is removed, the opening should be sealed or repaired correctly and its location documented. Visual evidence then needs to be compared with moisture, temperature, weather, leak, and HVAC findings. A moisture-source theory isn’t useful until it’s verified.
Can Moldy Acoustic Panels Be Saved?
The answer depends on what the panel is made from, how deeply it’s affected, and whether cleaning can be performed without spreading contamination. Treating every acoustic product the same doesn’t work.
| Material or Component | Typical Concern | Possible Response |
|---|---|---|
| Acoustic foam | Highly porous and difficult to clean below the surface | Removal is often appropriate when contaminated |
| Fabric-wrapped fiberglass or mineral wool | Fabric, dust, binders, and backing may retain contamination | Evaluate the complete panel and manufacturer guidance |
| Paper or cellulose tile | Absorbs moisture and may lose strength | Damaged material commonly requires disposal |
| Wood fiber or composite board | Can swell, soften, or support growth | Condition and depth of damage determine feasibility |
| Metal brackets and sealed hardware | Surface contamination or corrosion | Cleaning may be possible if the item remains sound |
| Paper-faced drywall | Growth may extend into the paper and gypsum interface | Damaged sections may require controlled removal |
Hard, nonporous parts may be cleaned with detergent, physical wiping, and thorough drying when the remediation plan allows it. HEPA-filtered equipment can support final cleaning. Porous panel faces, foam, backing, and deteriorated drywall are much harder to restore because contamination may extend beneath the visible surface.
Bleach isn’t the default answer. Spraying bleach through a borescope opening adds liquid to a concealed assembly, may spread contamination, and doesn’t remove damaged material. Dead mold can still contain irritating or allergenic particles. The EPA doesn’t recommend routine bleach use for mold cleanup.
Paint and encapsulating coatings aren’t shortcuts either. Coating a damp, deteriorated surface hides the evidence without correcting the cause. The wall must be dry, damaged material must be addressed, and any coating must be appropriate for the assembly and remediation plan.
Fix Moisture Before Reinstallation
Removing moldy material while leaving the moisture source is restoration theater. The new panel may look clean for several months, but it’s being installed in the same conditions that damaged the first one.
Leak repairs should be tested rather than assumed. Window and roof work may need observation during rain or controlled water testing. Plumbing repairs should be checked under operating conditions. Duct leakage, condensation, and HVAC drainage need their own inspection rather than being blamed on “high humidity” by default.
EPA guidance generally recommends drying wet materials within about 24 to 48 hours when feasible. That doesn’t mean mold starts on a stopwatch at exactly 24 hours. It means prompt drying reduces the chance of microbial growth and material deterioration. The EPA’s homeowner moisture guide also recommends indoor relative humidity below 60 percent and ideally around 30 to 50 percent where practical.
Humidity control alone may not correct a cold exterior wall. Insulation continuity, thermal bridges, air leakage, and the wall’s vapor profile may need review. Any new vapor-control layer should be selected for the climate and assembly. Creating a double vapor barrier can leave moisture with no useful drying path.
The repaired wall should be verified as dry before replacement panels are installed. Removable clips or impalers may allow future inspection more easily than permanent adhesive. Manufacturer requirements for substrate moisture, surface preparation, and adhesive curing should also be followed.
Texas Mold Rules May Apply
Texas regulates certain mold assessment and remediation work through the Texas Department of Licensing and Regulation. Requirements may address licensing, separation of assessment and remediation functions, protocols, work plans, notifications, post-remediation assessment, and clearance.
When suspected growth covers or may extend to 25 contiguous square feet or more, property owners should check current TDLR mold requirements and consult appropriately licensed professionals. Concealed contamination can be larger than the patch visible through a borescope, so the first camera image shouldn’t be used to estimate the project casually.
The 25-square-foot figure isn’t a universal DIY safety line. Applicability, exemptions, property type, and affected-area calculations must be evaluated under current rules. EPA cleanup categories are guidance and don’t replace Texas law.
Professional involvement is also warranted when contamination may involve an HVAC system, sewage or contaminated water, substantial wall cavities, structural deterioration, or medically vulnerable occupants. People with asthma, mold allergies, chronic lung disease, or weakened immune systems may need to avoid the work area and discuss personal health concerns with a medical professional. The CDC’s mold health information describes possible effects such as coughing, wheezing, nasal irritation, eye irritation, skin irritation, and asthma symptoms without making unsupported claims based on mold color.
Preventing Mold Behind New Panels
Replacement starts with a dry wall and a verified repair. Roof, window, plumbing, masonry, and exterior-envelope leaks should be corrected before acoustic materials return. Confirmed air-leakage paths should be sealed with methods appropriate for that wall rather than covered with whatever tube of sealant happens to be nearby.
Studios, home theaters, rehearsal rooms, offices, and podcast spaces deserve regular humidity checks because they’re often closed tightly and packed with heat-producing equipment. HVAC systems need enough runtime to remove moisture, and large panel layouts shouldn’t block supply or return airflow. Recurring condensation should be investigated rather than wiped away every morning.
Moisture-prone exterior walls benefit from mounting systems that allow panels to be removed for inspection. Periodically checking panel edges, window areas, baseboards, and exterior-wall penetrations can catch small changes before an entire installation is affected. Keeping furniture and stored equipment away from known damp areas also makes warning signs easier to spot.
If you smell a persistent musty odor or suspect acoustic panel mold in an Austin-area property, Austin Hi-Tech Restoration can help evaluate the damage and determine the appropriate next step. A borescope inspection may locate concealed evidence with limited disturbance, but lasting repairs still depend on finding the water, defining the affected materials, and correcting the conditions behind the panel.