
Can wet insulation dry inside a closed wall if you point a fan at it? Sometimes lightly damp materials can dry in place, but your room fan usually dries the painted surface while moisture remains against the framing and back of the drywall.
If you’re dealing with wet insulation after water leak damage, the first decision isn’t which fan to buy. Learning how to dry wet wall insulation starts with identifying what got wet and whether your wall has a usable drying path.
Speed matters because the EPA recommends drying wet materials within 24 to 48 hours when possible to reduce the chance of mold growth. That window doesn’t guarantee that your insulation can be saved. Saturated cellulose doesn’t get a free pass because you found the leak yesterday.
A professional wall-drying process relies on measurements rather than guesswork. We locate the source and map the hidden moisture before drying your wall, then verify that the concealed materials are dry before repairs begin.
Why the Wall Face Dries First
A household fan moves air across the side of the drywall you can see, but painted drywall and wall coverings can limit how much air reaches the cavity. The front may feel dry to you while the back paper remains damp. Water can also run downward inside your wall and collect around the bottom plate, far below the visible stain. A fan aimed at shoulder height does little for water sitting behind the baseboard. When liquid water evaporates from your wall, it enters the room air. Without dehumidification or effective ventilation, your fan can end up circulating humid air. Building Science Corporation’s moisture guidance explains why moisture movement and the wall’s drying potential must both be considered.
Step 1: Stop the Leak and Check Safety
You need to repair the water source before drying begins. A slow pipe leak can keep feeding the cavity even after the visible dripping stops, so we confirm that your plumbing is no longer releasing water and check whether moisture reached the floor. If water contacted an electrical component, don’t open the wall until the power and wiring have been evaluated. Your home’s age matters as well. Cutting painted drywall in a pre-1978 home may disturb lead-based paint, while some older wall materials may require asbestos testing. The EPA lead-safe renovation requirements cover work that disturbs painted surfaces in qualifying homes.
Step 2: Map the Hidden Moisture
A professional assessment follows the moisture beyond the stain you can see. If a supply line leaked between two studs, water may have moved across the bottom plate and wicked into the next cavity. Checking one spot in the middle of your stain can miss that spread.
Non-invasive moisture meters help us compare broad wall areas and locate suspicious zones in your home. Pin-type meters can provide more direct readings in suitable materials. You shouldn’t treat either tool like a magic truth detector because wall layers and meter settings affect the result.
An infrared camera can reveal temperature patterns associated with evaporation, but it cannot see through your drywall or prove that insulation contains water. We confirm suspicious patterns with moisture readings and, when appropriate, a small borescope inspection.
Your room conditions determine whether the air can accept more moisture. Temperature and relative humidity establish a starting point, giving your later readings something useful to beat.
Step 3: Identify the Wall Materials
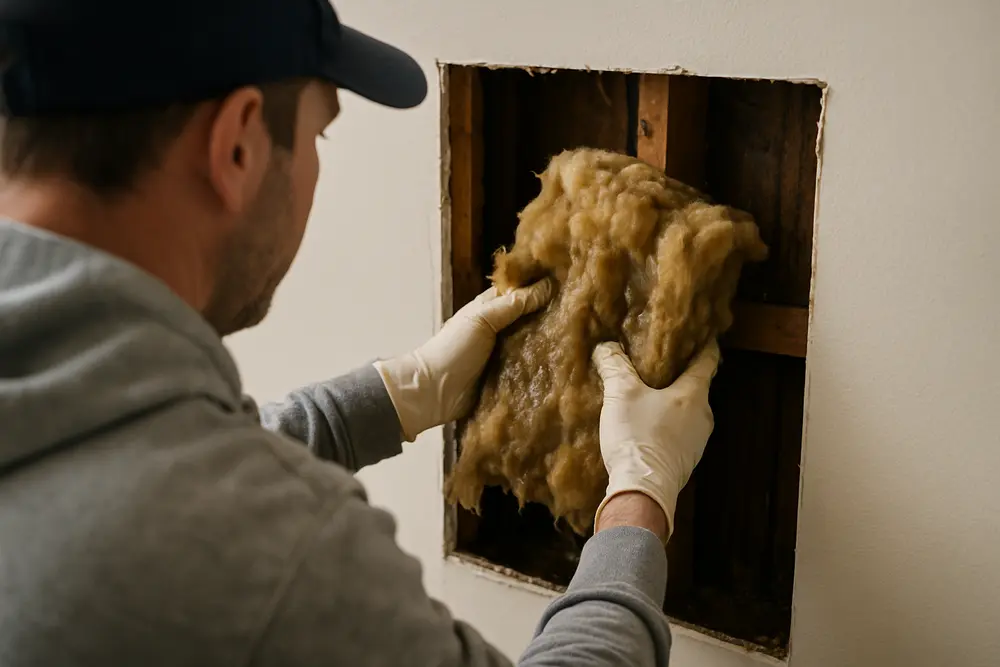
Your insulation type has a large influence on the decision. Fiberglass fibers absorb little water, but a batt can trap water against drywall paper. Its facing can stay wet, and a soaked batt may slump.
Blown cellulose is highly absorbent and can settle after wetting. Mineral wool may resist bulk water better, but it can leave moisture against nearby wood. Foam presents a different problem because it may conceal wet framing behind material that looks dry to you.
Your wall finish matters as much as the insulation. Vinyl wallpaper or rigid foam can slow drying. When restrictive layers trap the wall cavity, you may have almost no practical drying route.
Step 4: Decide What Can Stay
Your choice between removal and controlled in-place drying depends on whether the material remains salvageable and whether dryness can be verified. The goal isn’t to save every square foot of drywall. It’s to leave you with a dry wall assembly that can be measured with confidence.
When Removal Is Usually the Better Call
If contaminated water entered your wall, removal is usually the sounder choice. Sewage or groundwater can leave material you don’t want trapped in porous insulation. A clean supply-line leak gives you a better starting point, but contact with a dirty building cavity can increase the risk over time.
Saturated fiberglass or cellulose insulation is a poor candidate for heroic drying attempts. The EPA’s material-specific remediation guidance recommends discarding wet fiberglass and cellulose insulation. You should also expect removal when your drywall is soft or separating into layers.
When In-Place Drying May Work
You may be able to dry limited areas in place after a recent sanitary-water leak if the wetting is light and the materials remain intact. Your cavity still needs an effective airflow path, controlled room humidity and access to the wettest location for repeated measurements.
Drying in place becomes a bad bet when your insulation blocks airflow or the bottom plate can’t be measured. If readings stop improving, keeping the wall closed to avoid a small drywall repair is false economy.
Step 5: Open the Cavity
The access we create should match the extent of wetting in your wall. Removing a baseboard and drilling controlled holes behind it can work for a lightly affected empty cavity, but holes along the floor accomplish little when soggy insulation is packed against them.
More extensive wetting may require a limited drywall opening. Once your wall is open, we can inspect the framing and determine whether water entered an adjoining cavity.
DIY wall opening becomes risky when you don’t know what’s behind the drywall. Your wall can contain wiring or older materials that shouldn’t be disturbed casually, and random holes made with a long drill bit are not a drying plan.
Step 6: Control Airflow and Humidity
Remove Liquid Water First
When liquid water remains, you need physical extraction before evaporation equipment can do its job. Increasing heat without removing trapped water is mostly wishful thinking, and excessive heat can damage your finishes.
Extraction removes water that would otherwise have to evaporate into the room, but it doesn’t prove that the cavity is dry. The framing, drywall and insulation still need to be evaluated so the drying setup addresses every material that remains wet.
Build a Complete Drying System
Professional equipment works as a system in your home. Air movers encourage evaporation from exposed materials, while dehumidifiers capture the vapor released into the room.
Temporary ducting may direct dry air into spaces your room fan cannot reach. That airflow needs a practical route through or across the wet area rather than being aimed at the painted wall face and left to run.
More airflow isn’t automatically better if the released moisture stays in the room. The correct equipment setup depends mainly on the wet area’s size, the available drying path and the dehumidifier’s ability to control the room conditions.
Step 7: Monitor the Drying Process
Track Changes at the Wettest Locations
Your wall isn’t dry just because the equipment ran for three days. Some cavities respond quickly, while wet sheathing can slow the process. Time alone proves nothing.
We record moisture readings where the initial mapping found the highest levels. We track your room’s humidity as well, then compare the material readings with similar unaffected areas in your home.
Respond When Readings Stop Improving
A steady downward trend shows you that the drying plan is working. A plateau is useful information because it may reveal an ongoing leak or blocked airflow. Stalled readings can also show that water traveled farther than your original stain suggested.
When your readings stop improving, the setup should change. We may need to open more of the cavity or reposition the drying equipment. Leaving the same fans in place and hoping for a better reading tomorrow isn’t professional monitoring.
Step 8: Verify Dryness Before Repairs
A faded stain doesn’t prove that your framing is ready to cover. Neither does a dry room smell. Verification should revisit the spot that was wettest at the beginning rather than relying on one low reading near the damage’s edge.
We compare your final readings with an appropriate dry standard, often similar unaffected materials in the same building. That comparison needs to cover the materials and locations identified during the initial moisture mapping.
There isn’t one universal moisture percentage for every wall because meters and materials respond differently. Before new insulation and drywall are installed, your framing should be dry enough for closure and the cavity should be checked for visible deterioration.
When DIY Drying Has Reached Its Limit
You should stop relying on a room fan when an insulated wall was wet beyond a minor surface splash. Soft drywall or a persistent musty odor suggests that the visible surface isn’t telling you the full story. Professional assessment also makes sense when you don’t know how long the leak lasted or suspect that water reached multiple cavities. Water near electrical components requires extra caution, as does possible sewage contamination. If your readings remain elevated or you can’t measure the framing, you don’t have proof of drying. Local water damage repair services can map your affected area and determine whether controlled drying is realistic before you seal the wall again.
Common Questions About Wet Insulation
Can Wet Insulation Dry Without Removing Drywall?
Your lightly affected insulation may dry in place when the water was sanitary and the cavity has a usable airflow path. You still need to measure the progress. Saturated absorbent insulation often requires removal so the framing and back of your drywall can be inspected.
How Long Does Wet Wall Insulation Take to Dry?
There is no reliable fixed number of days for your wall. The drying time depends mainly on saturation and the wall’s drying path. Daily moisture readings will tell you more than an equipment timer.
Should You Replace Wet Insulation After a Leak?
You should generally plan to remove wet cellulose and saturated fiberglass, especially if the material has compressed. Other insulation types still require an assembly-level inspection because dry-looking foam can hide moisture against your framing.
Will Bleach Fix Mold Inside a Wet Wall?
Bleach doesn’t replace moisture removal or disposal of damaged porous material in your wall. If growth is present, you must correct the source and follow an appropriate cleaning or removal plan before closing the cavity.
References
- A Brief Guide to Mold, Moisture and Your Home (epa.gov)
- BSD-108: Investigating and Diagnosing Moisture Problems (buildingscience.com)
- Lead Renovation, Repair and Painting Program (epa.gov)
- Mold Remediation in Schools and Commercial Buildings Guide: Chapter 2 (epa.gov)