
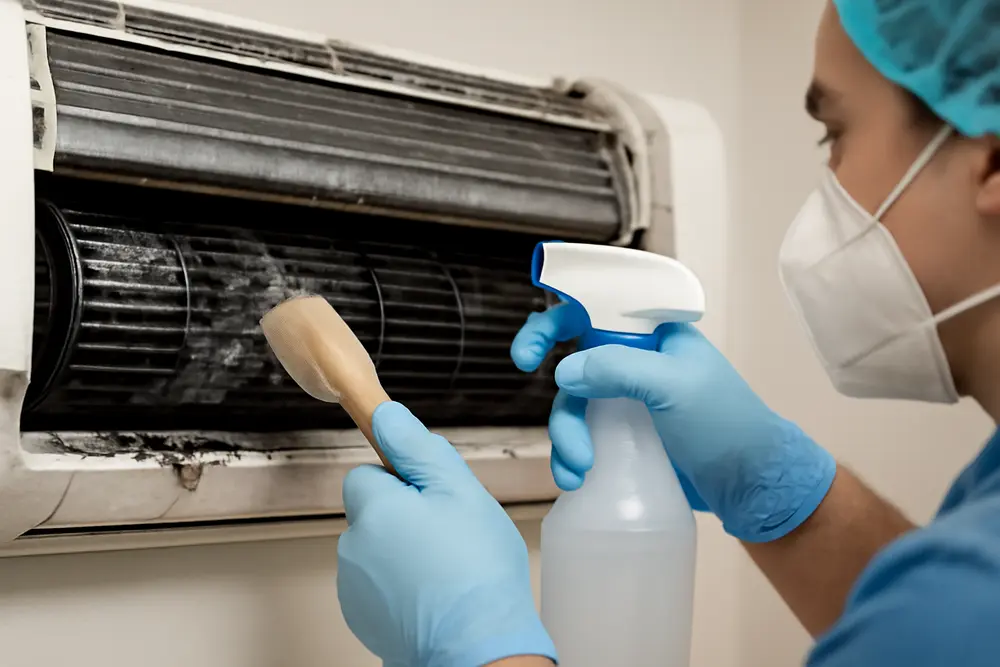
If your mini-split greets you with a musty locker-room whiff or stops cooling like it used to, there is a good chance the blower wheel and evaporator coil are wearing a biofilm tuxedo. That slimy layer traps dust, hogs airflow, and turns your indoor head into a petri dish with a fan. Here is how to spot the gunk, handle mini-split blower wheel cleaning and evaporator coil mold removal safely, keep the drain moving, and set humidity so mold does not make a comeback tour.
Why Mini-Splits Grow Biofilm
Mini-splits are moisture magnets by design. Warm air hits a cold coil, water condenses, and if drainage and airflow are not perfect, that moisture hangs out. Add a steady buffet of dust, skin flakes, pet dander, and cooking aerosols, and you have a mold Airbnb. High indoor humidity accelerates it. Units that cycle lightly but often or run with continuous fan in sticky climates tend to grow slime faster because the coil and drain pan stay damp. If the drain line is clogged or pitched poorly, water lingers and spores throw a party.
Example you can probably smell from here. A 12k BTU wall unit in a home office where the door stays shut and the RH hangs around 60 percent will coat its blower wheel vanes in three months. Airflow drops, the coil starts to ice at the top, and every start-up blasts Eau de Basement at your face.
How To Spot Trouble Fast
Your nose is usually first on scene. A musty or dirty-sock smell at start-up screams biofilm. Pop the front cover and pull the filters. If the filters look like gray felt, assume the surfaces behind them are worse. Shine a flashlight at the blower wheel and coil. You are hunting for black or gray fuzz on coil fins, opaque slime on the plastic blower vanes, or standing water and goop in the drain pan. Reduced airflow, uneven cooling across the coil, or frequent icing also point to airflow obstruction from buildup.
If you see anything moving that is not supposed to, like droplets riding the wheel and flinging off, you have a cleaning date. Catch it early and you will spend an hour. Wait until the wheel looks like it rolled through a compost bin and you are blocking off a Saturday.
Gear And Prep That Keep You Safe
Power is not a suggestion. Shut the mini-split down at the breaker, not just the remote. You are about to add water and cleaner to a live appliance if you skip this, and your installer is not the only one who will be shocked. Wear nitrile gloves and eye protection. If there is heavy growth, add a mask rated for fine particulate. Lay down a wash bag or cleaning bib under the head and set a bucket to catch runoff. Keep a soft brush, microfiber cloths, a fin comb, a low-pressure spray bottle, and a wet or dry vacuum handy. Cover the control board and any exposed wiring with plastic and painter’s tape so they do not catch overspray.
Check the manual for your brand because some indoor heads remove in different steps. You are not pulling refrigerant lines or removing the unit from the wall for this routine clean. If your unit requires that level of disassembly to reach the wheel or pan, that is a pro job.
Blower Wheel Cleaning Without Wrecking It
The blower wheel in most ductless heads is a long tangential or cross-flow fan. Its thin vanes act like little shovels and they plug fast. Removing buildup here makes the biggest difference in smell and airflow.
Open the front cover and remove the filters. On many models the front fascia lifts off after a few tabs and screws. Do not force it. Once the wheel is exposed, spray a coil-safe cleaner that lists compatibility with plastics and aluminum. Foaming products cling well, which matters on vertical surfaces. Let it dwell according to the label. Five to ten minutes is common. Rotate the wheel slowly by hand to wet every vane. Use a soft brush to coax stubborn slime off the leading and trailing edges. Avoid stiff brushes that gouge plastic and throw off balance. Rinse with low-pressure water into the wash bag. Keep the spray shallow so it rides down the pan instead of bouncing into the electronics. Work in sections until the runoff clears.
Pro tip from the field. If the buildup is crusty, a second dwell cycle beats more scrubbing. Balance matters on these wheels. Remove too much material on one side or scar the vanes and the wheel can buzz or shake. If you see hairline cracks or missing chunks, stop and call a pro. A wobbly wheel can take out bearings and motors in short order.
Evaporator Coil Mold Removal That Works
The coil is the cold heart of the show and it is delicate. Those fins bend if you look at them wrong, which is why you keep pressure low and brushes soft. Spray a coil-safe HVAC cleaner across the fin pack from top to bottom. Hit the upper third slightly more because that is where airflow and condensation often load the hardest. Let it dwell as labeled so the chemistry can break biofilm bonds. Rinse gently until the rinse water runs clear into the pan. If you bent fins by accident, use a fin comb sized for your fin pitch to straighten them. That small step restores a surprising amount of airflow.
Skip bleach. It is corrosive on aluminum and copper and it will not cling long enough to do much beyond etching. Avoid acidic coil cleaners made for greasy rooftop units unless the label says they are safe for aluminum evaporators. If you want a disinfectant step, use an EPA-registered product approved for non-porous HVAC surfaces and follow the contact time. Anything that requires a potable-water rinse needs that rinse. Residue left behind can be sticky, which attracts fresh dust faster.
Drain Pan And Line That Actually Drain
A clean coil and wheel will still stink if the pan is a swamp. After the wheel and coil rinse, inspect the pan for slime ropes, algae mats, or rust stains. Wipe the pan sides and corners with a soft brush and cleaner. Check that the drain outlet is clear. If you see standing water that does not move, your line may be clogged or the unit may not be pitched right. For the line, pull the exterior end cap if there is one and apply your wet or dry vacuum to the outlet for a minute. Snake a small amount of warm water down from the pan side and watch for flow outdoors. If a condensate pump is installed, clean the pump reservoir per its manual and verify that the float switch moves freely.
Skip drop-in tablets in the tiny wall-unit pan. They tend to sit right over the outlet and cause blockages or leave residue. If you want biocide control in the drain circuit, use products designed for mini-split pans and apply them exactly as labeled. Most homeowners do best with clean-and-flush, not chemical crutches.
Dry Out And Reassemble The Right Way
Once everything is rinsed and the runoff is clear, blot accessible plastics with microfiber to speed evaporation. Reinstall the panels only after surfaces are visibly dry. Filters should be washed under running water and dried fully before they go back in. Power the breaker back on and run the unit in Dry mode or fan-only mode for 20 to 60 minutes with louvers wide open. That short drying cycle drives out lingering moisture, which is one of the easiest ways to keep mold from regrouping. If your unit auto-tilts the louver closed when off, set it to stay open during the dry cycle so air reaches the wheel and the pan lip.
What Cleaners Should You Use
Pick a foaming HVAC coil cleaner that states compatibility with aluminum fins and plastics. Mild alkaline or neutral products are friendlier to indoor heads. For disinfecting, look for an EPA registration and instructions that allow use on HVAC evaporators and blowers. Follow dwell times. Old-school kitchen degreasers, vinegar, and bleach are popular myths that end with etched fins, ruined coatings, and recurring odors. You would not wash your car with sand, so do not wash your coil with acid.
Water pressure matters more than you think. Use a pump sprayer or squeeze bottle, not a pressure washer. Keep the water low and let gravity do the work with that wash bag doing its job. If you do not have a wash bag, you can improvise with taped plastic sheeting and towels, but be ready for drips and do not flood the wall.
Humidity Settings That Stop Mold
Indoor RH should live between 30 and 50 percent year-round. Above 60 percent, mold stops asking for permission and just shows up. In summer, target 40 to 50 percent. In winter, 30 to 40 percent helps avoid window condensation and chilly-feeling rooms. Many mini-splits have a Dry mode that reduces RH gently without overcooling. Use it after big cooling runs or when the weather is muggy but not hot. If your unit allows a humidity setpoint, aim for 45 percent and let it float a bit. Pair that with Auto fan while cooling so the coil stays cold long enough to wring moisture out, then use fan-only for a short post-run dry out.
Keep sources of moisture in check. Bathroom fans should exhaust outdoors and run through showers plus 20 minutes after. Kitchen hoods should actually pull to the outside, not just rely on a recirculating filter. Fix dripping faucets and window leaks. Dust more than you think you need to. Dirt plus moisture equals biofilm, and your blower will feed on whatever lands on it.
When Should You Call a Pro
There is a line between DIY clean and real remediation. Call a pro if you have persistent leaks even after clearing the drain, if the coil ices regularly or the unit throws error codes, or if the blower wheel looks like a biology experiment that will take hours to scrub. Any cleaning that requires removing the wheel, detaching the drain pan, or disconnecting electrical harnesses belongs to a trained tech. People with asthma, severe allergies, or immune issues should not do this work. If odor lingers after a proper clean and dry, you might have hidden contamination in duct chases, wall cavities, or the line set box-out that needs professional attention.
Warranty still in play. If your indoor head is under warranty, your manufacturer may require service by an authorized dealer to protect coverage, especially if parts need removal. A good restoration or HVAC outfit can also verify charge levels, airflow targets, and system tuning that help keep the coil colder when it should be and drier when it should be.
Maintenance That Sticks
Filter work beats elbow grease every time. Wash or replace filters monthly during heavy use and at least every other month the rest of the year. Inspect the blower wheel and coil quarterly. If you see a light dust haze, a quick spritz and rinse saves you from a deep scrub later. Make mini-split blower wheel cleaning part of spring and fall prep, right along with checking that the outdoor unit is clear of leaves and cottonwood fluff. Verify the drain line every spring by sending a cup of warm water through the pan and confirming flow outdoors.
Keep your RH meter honest. Get a simple digital hygrometer and park it in the room the head serves. If it reads over 50 percent regularly, tweak setpoints, use Dry mode, or add a dedicated dehumidifier for stubborn basements and bonus rooms. Program the head so it does not run continuous fan with the compressor off in humid weather. That habit blows warm, damp air over a cool coil, which re-wets surfaces and breeds slime faster.
If you share space with furry friends or use the room for crafts or workouts, shorten your cleaning interval. A home gym where the mini-split cools sweat and breath six days a week will load up faster than a guest room that sees action twice a month.
Real-World Cleaning Walkthrough
Here is a simple home example that mirrors what we do in the field. The unit is a 9k wall-mount serving a small bedroom. Power off at the breaker. Filters out and rinsed. Front cover removed by releasing two lower clips and two upper tabs. Control board shielded with a taped plastic flap. Wash bag zipped under the head and tucked behind the pan lip. Foaming coil cleaner sprayed across the fins with a five-minute dwell. Gentle rinse until the water sheds clear. Blower wheel sprayed and rotated by hand, soft-brushed where the vanes are thickest at the center line, then rinsed in sections. Pan wiped and the drain outlet checked, followed by a quick wet or dry vacuum pull at the outdoor end of the line. Panels dried and reinstalled. Breaker on and Dry mode run for 30 minutes. Room RH measured at 44 percent two hours later. Odor gone and airflow up enough that the customer asked if we swapped the unit while they were not looking.
What You Should Never Do
Do not blast the coil with a pressure washer. Do not scrub fins with a wire brush. Do not pour bleach into the pan or down the drain line. Do not soak the motor or control board. Do not run the fan to try to blow mold off the wheel. That turns your room into a mold confetti parade. Do not ignore a slow-draining pan. Water plus time equals growth, and growth slows airflow, which makes more water. You get the idea.
FAQ
How often should I do mini-split blower wheel cleaning?
Most homes do well with a light wheel and coil rinse every six months and a deeper clean yearly. Add one more quick clean mid-summer if you have pets, high pollen, or keep RH near 50 percent. Monthly filter washing is non-negotiable.
What is the safest product for evaporator coil mold removal?
A foaming HVAC coil cleaner labeled safe for aluminum and indoor use is your go-to. If you need a disinfectant step, pick an EPA-registered product that allows use on HVAC coils and plastic blowers and follow contact time and rinse directions. Skip bleach and strong acids.
Why does my mini-split smell musty right after a new filter?
Filters trap fresh dust, but odor lives on the coil, blower wheel, and pan. If those are slimy, a new filter will not fix the stink. Clean the wheel and coil and dry the unit in fan-only or Dry mode after.
Can I pour vinegar down the drain line?
Vinegar is not great for the thin coatings and metals in mini-split pans and it often leaves its own smell. Warm water and a wet or dry vacuum at the outlet clear most clogs. If you want a biocide, use one designed for condensate systems and follow the label.
Why does humidity matter so much?
Mold needs moisture. Keep RH between 30 and 50 percent and it has a harder time colonizing your coil and wheel. Above 60 percent, even a clean unit can grow fuzz in a hurry. Adjust setpoints seasonally and use Dry mode when weather turns sticky.
When DIY Meets Reality
If you followed the steps and your unit still smells, leaks, or struggles, it is time to tag in a pro. We handle blower wheel removal, pan split and deep-clean, coil straightening, and drain-line rebuilds without turning your wall into a splash zone. Pros also check refrigerant conditions and airflow targets, which quietly prevent mold by getting the coil cold enough to dehumidify and then dry between cycles. Your mini-split should cool hard, drain clean, and smell like nothing at all. If it does not, we will make it right and explain what went sideways so it does not happen again.