Vinyl wallpaper hides damp mold. Use moisture meter testing and infrared to catch it early, then contain the mess, remove the covering, scrub the glue, and shut the door on a repeat performance with permeable paints and better airflow. If you like your lungs and your drywall, this is your playbook.
Hidden Mold Behind Wallpaper
Wallpaper can turn a plain wall into a feature wall. Vinyl-coated wallpaper also turns that feature wall into a moisture trap. In humid regions like Central Texas, or in any room that likes to fog up your mirror, water vapor looks for a cold surface to condense on. The back of vinyl wallpaper is perfect. The front looks clean while the back throws a mold party. Your nose gets the first invite with that vintage basement smell. Your drywall gets the hangover.
Here is the short science. Vinyl coverings have very low vapor permeability. They block vapor trying to escape from the wall cavity to your room, so any wet drywall under that vinyl dries at a snail’s pace. Building science folks have tested this for years and confirmed that vinyl wallcoverings severely limit vapor transfer. If you want to geek out, see the NIST technical bulletin on vapor transmission in wall systems at nvlpubs.nist.gov. Translation for the rest of us. Vinyl traps moisture. Trapped moisture grows mold.
Why Vinyl Wallpaper Traps Moisture
Vinyl-coated wallpaper is basically plastic over paper. Plastic does a great job blocking vapor. Drywall is mildly porous and can absorb and release vapor, which is normal in a home that breathes. Stick a plastic layer over drywall and the moisture that enters the wall from leaks, showers, high humidity, or temperature swings cannot move out efficiently. Even a small pinhole leak in a supply line or window weep can keep the back side of that wallpaper damp for weeks.
Condensation is the sneaky one. Your air conditioner chills the exterior walls during summer. Warm humid indoor air meets that cooler surface behind the wallpaper. If the surface temp slips below the dew point, water condenses on the back of the vinyl. You do not see water beads. You just get a spore farm. That is why powder baths with no fan, laundry rooms with a dryer that vents poorly, and exterior walls shaded by trees often lead the league in wallpaper mold.
Signs Your Wallpaper Hides Mold
Hidden mold rarely waves a flag. It taps you on the shoulder with clues. Here is what we find on real jobs.
Musty odor that lingers after you clean. Seams curling or yellowing at the edges. Blisters or bubbles that appear after a humid spell. Brown or gray ghosting where studs or joint compound lines run. Paint on adjacent trim that keeps cracking. Baseboards that swell for no good reason. In extreme cases, you peel a corner and see black or green staining on the backing paper or the drywall face. By the way, staining color does not tell you what species it is. It just tells you you waited too long.
Some rooms give off zero visual hints. That is when tools earn their keep.
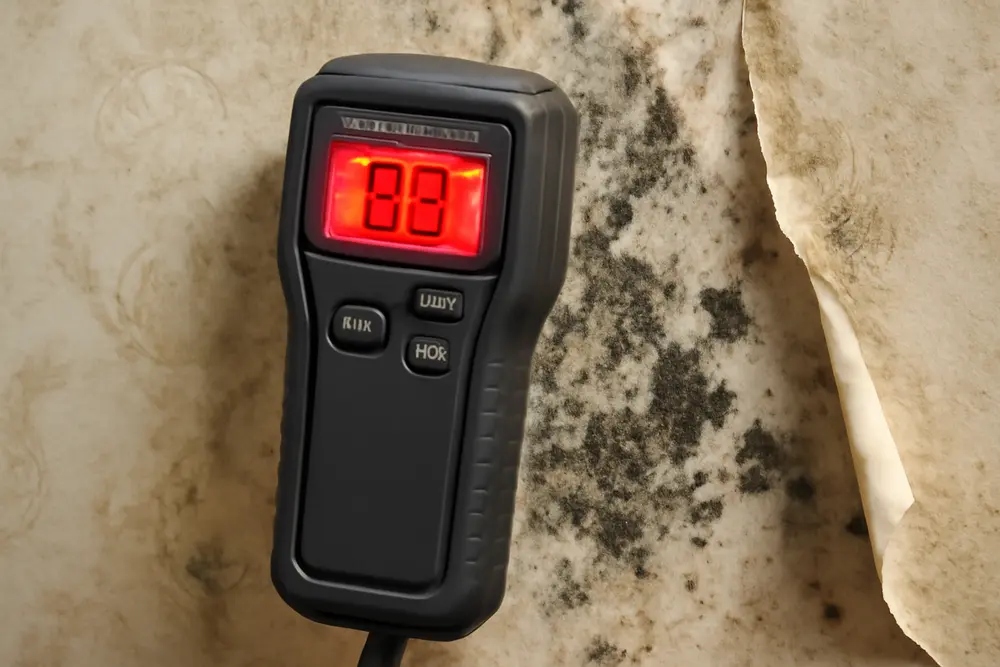
Moisture Meter Testing That Works
Moisture meter testing is how pros find damp drywall before demolition starts. We use two types in wallpaper scenarios. Pinless meters scan the surface and flag elevated moisture quickly. Pin meters have little probes that measure deeper into the drywall. Both have their place.
Here is how to do it right.
Start where trouble likes to hide. Along baseboards, at outside corners, under windows, around toilet supply lines, near shower walls, and at wallpaper seams. Scan with a pinless meter to spot hot zones. Follow up with a pin meter at those same spots to confirm the depth and level of moisture in the gypsum core. Compare readings to a known dry interior wall as your baseline. Drywall does not have a true wood moisture equivalent, so use the meter’s relative scale and look for anomalies that are higher than your baseline by a clear margin.
Pro tip. Do not press so hard you dent the wallpaper. If the vinyl layer is thick, you may get a muted reading on a pinless meter. That is your cue to switch to a pin meter and probe discreetly at a seam, behind a switch plate, or under a baseboard cap. For a deeper walkthrough on using meters to find hidden dampness after water events, the flood guide at austinhi-tech.com backs this up. Check their advice on moisture meters at austinhi-tech.com.
How Infrared Finds Hidden Dampness
Infrared thermal imaging sees temperature differences on surfaces. Wet drywall cools down as water evaporates. That creates a cooler signature compared to the dry areas around it. Point an infrared camera at a suspicious wall and look for cooler patches, vertical streaks that match stud bays, or damp halos under windows.
Infrared is not x-ray vision. You need a temperature difference in the room to make patterns pop. In Austin summers, your AC already gives you a helpful gradient. In shoulder seasons, run the HVAC to create a bigger difference. Always verify any cool spot with moisture meter testing. A cold AC supply duct in a chase can look like a leak on infrared. The meter tells you if moisture is actually present.
Safe Containment and Removal
Once you confirm hidden moisture and likely mold, do not rip and run. Disturbing moldy wallpaper without containment spreads spores into the rest of the house. Here is the safe way we set up a room before removal.
Turn off the HVAC to the work area and cover supply and return registers. Build containment with 6 mil plastic from floor to ceiling and seal entry with a zipper door. Run a HEPA-filtered negative air machine to pull air from the work zone and exhaust it outside. Aim for steady negative pressure so any leak in the plastic pulls air in, not out. Lay down a sticky mat at the exit. Suit up with gloves, eye protection, and an N95 at a minimum. For bigger jobs, a P100 respirator is better.
Now remove the wallpaper in layers. Vinyl-coated paper usually has a top layer that peels first. Pull it off in manageable strips and bag it as you go. The backing paper and adhesive will cling to the wall. Loosen this with a steamer or a gel remover made for wallpaper. Work in small sections to avoid soaking the drywall. If the backing paper is moldy or the drywall face bubbles and shreds, stop and plan on replacing that section of drywall instead of trying to save it.
Keep dust down. Mist surfaces lightly with clean water before you scrape. If you see visible mold on the drywall, HEPA vacuum first to capture loose spores, then damp wipe. Never dry brush moldy material. If you expose insulation that is visibly moldy or wet, remove and bag it. For large areas, EPA guidance says to bring in trained help. You can find general mold cleanup guidance from public sources at epa.gov.
Sticky Truth About Adhesive Cleanup
Adhesive is the sneaky fuel that keeps mold coming back. Many old-school pastes are starch-based. Mold loves starch. Even modern adhesives can trap dust and stay tacky, which holds moisture like a sponge. If you leave residue on the wall and roll paint over it, you just sealed in a buffet.
Break the bond without wrecking the drywall. Warm water with a small dose of dish soap or a wallpaper remover works for most glues. Some enzyme-based removers are great on heavy paste. Apply with a sponge, let it dwell, then scrape with a wide putty knife at a low angle. Keep the wall damp, not dripping, to avoid delaminating the drywall face. Skip aggressive scoring wheels that shred paper. If the face paper bubbles, that area is done and needs a skim coat with setting-type compound or a full replacement.
After the paste is gone, rinse with clean water and wipe until the wall does not feel slick. A final pass with a microfiber cloth helps. Then let the wall dry fully. Do not rush this. Adhesive can look dry and still hide moisture in the paper layer. Verify dryness with moisture meter testing at multiple spots before you move to primer.
Cleaning and Drying the Substrate
With the wallpaper and glue gone, address what the mold did to the substrate. On sound drywall with light surface growth, a detergent wipe and HEPA vacuuming can be enough. Bleach is not your friend on porous materials like drywall. It does not penetrate well and adds more moisture. A mild detergent solution and physical removal is the goal. On nonporous trim, a disinfectant labeled for hard surfaces can help after you clean.
If drywall feels soft, crumbles, or smells musty after cleaning, cut it out. We typically remove back to the nearest stud bay and at least 6 to 12 inches beyond the last visible stain. Bag everything before it leaves containment. Inside the open wall, check insulation. Fiberglass batts that got wet can sometimes be dried if they are clean and not matted, but any visible growth means they go.
Dry the area to target moisture levels before you rebuild. Run dehumidifiers sized to the room and position air movers to push dry air across surfaces without blasting spores everywhere. Measure and log readings daily. For drywall, look for a stable reading that matches adjacent known-dry walls. For wood framing, hit 15 percent or lower. If you are working in a sticky Austin week, you may need extra dehumidification to beat the outdoor humidity.
Preventing Mold With Permeable Paints
Once things are dry and clean, put the wall back together in a way that lets it breathe. This is where permeable paints make all the difference. Permeability is the measure of how easily water vapor passes through a finish. Higher perms mean better drying potential. Vinyl wallpaper is basically zero perms. Glossy oil paint is low. Many matte acrylics are moderate. Mineral silicate paints and true limewash are high.
For most interior walls that used to wear vinyl wallpaper, ditch the vinyl and pick a paint and primer with good permeability. Many mineral silicate coatings test in the very permeable range. High quality flat or matte acrylics can also be a good match. Save low-perm finishes like glossy enamel for trim, not full walls. If you have a bathroom or laundry room, resist the urge to trap vapor with a rock-hard sealer. You want a finish that tolerates splashes but still breathes.
Ask for vapor-permeable data when you shop. You will see perms listed on technical data sheets. Look for higher numbers in rooms that run humid. Permeable paints are not a magic shield against leaks, but they help the little day-to-day moisture hiccups move through and evaporate before they feed mold.
Ventilation and Humidity Control
Permeable paints help only if the room offers an exit for vapor. That means better airflow and less indoor humidity. In bathrooms, install an exhaust fan rated at least 80 CFM for a small bath and more for a master. Put it on a timer to run 20 to 30 minutes after showers. In kitchens, use a range hood that vents outside, not a recirculating unit. In laundry rooms, verify the dryer duct is short, smooth, and actually sends air outdoors.
Keep indoor relative humidity in the 40 to 50 percent range. A small portable dehumidifier can manage a problem room, but whole-home dehumidification tied into the HVAC is the gold standard in sticky climates. Avoid running the HVAC fan in constant on mode because it can re-evaporate moisture off the coil and push it back into rooms. Fix window and door weatherstripping, add insulation on cold exterior walls, and address downspouts or grading that send rainwater against the foundation.
Austin Case Study Powder Bath Gone Bad
A homeowner in Central Austin called about a powder bath that always smelled like wet socks. The room had vinyl-coated wallpaper from the early 2000s. No visible mold. We started with infrared and saw a cool stripe under the window sill and another one running vertical down a stud bay. Moisture meter testing at the baseboard spiked compared to the opposite interior wall. We popped the trim and probed the drywall. Elevated moisture confirmed.
Containment went up and the wallpaper came off in two layers. The backing paper was spotted with gray growth in a patchy pattern under the window apron. The adhesive was thick and gummy. We steamed and scraped the paste in sections and bagged everything. The drywall under the window was soft, so we cut it out to the next stud on both sides. Inside the cavity, we found stained sheathing and a tiny path where rain had been sneaking in at a failed window corner flashing. The stain matched the vertical cool stripe we saw on infrared. Classic.
We HEPA vacuumed, detergent-cleaned, and dried the cavity to match the rest of the wall. The window was re-flashed by a contractor. New drywall went in, seams set with a setting-type compound that resists softening from minor moisture, then the wall was primed with a vapor-permeable primer and finished with a high-perm matte paint. We also installed a 100 CFM bath fan on a 30-minute timer. Two months later, no odor, no stains, and the moisture readings matched adjacent rooms even after a week of thunderstorms.
When To Call a Pro
If you find mold covering more than about a 3 by 3 foot area, if you see growth inside the wall cavity, if you smell mold in multiple rooms, or if anyone in the home is sensitive to indoor allergens, bring in a certified remediation team. They will set proper containment, run HEPA filtration, remove contaminated materials, and document dry standards. You still control the paint choice and the lifestyle fixes. They control the mess and the risk.
FAQ
Can I just paint over wallpaper that might have mold?
Bad idea. Paint traps what is already growing and can blister as more moisture builds up behind the paper. If you suspect mold, confirm with moisture meter testing, remove the wallpaper under containment, clean the substrate, then repaint with permeable paints.
Do I need to test the mold type before I remove wallpaper?
In most homes, the cleanup process is the same regardless of species. What matters more is the size of the affected area and whether spores spread during removal. Air or tape testing can be useful in complex cases, insurance claims, or if health providers request it, but do not let testing delay a clear moisture problem.
Will infrared cameras see through wallpaper?
No. Infrared reads surface temperature. It cannot see through materials. It helps you spot cooler areas that often line up with moisture under the surface. You then verify with moisture meter testing at those locations.
What if the drywall face peels while I remove adhesive?
That section is compromised. Cut it out and patch, or skim coat with a setting-type compound if the damage is shallow and there is no mold in the gypsum core. Always recheck for moisture before you close up the wall.
Are all latex paints considered permeable paints?
No. Many are moderately permeable, but sheen and formulation matter. Flat and matte finishes usually breathe better than satin or semi-gloss. Mineral silicate and lime-based coatings are typically very permeable. Check the perm rating on the technical data sheet.
Do dehumidifiers really help behind wallpaper?
They help the room hit healthy humidity targets so walls dry faster after daily moisture spikes. They will not fix a leak or a cold-wall condensation problem by themselves. Pair dehumidification with source control, insulation, and permeable paints.
Your Next Moves
If a room smells musty or the wallpaper seems to breathe when the AC kicks on, grab a moisture meter or call someone who owns a few. Target high-risk zones, verify with moisture meter testing, and do not skip containment if removal is on the table. Get the glue off, dry the substrate, and give your wall a finish that lets moisture out. Wallpaper can be gorgeous, but if it is vinyl in a humid space, it is asking for trouble. Trade the plastic jacket for a breathable coat and keep the science on your side. For inspections and full remediation in Central Texas, we are ready to roll with the tools, the containment, and the paint specs that stop the encore.
References and further reading. NIST on vapor transmission in wall systems at nvlpubs.nist.gov. Hidden moisture detection tips at austinhi-tech.com. Why mold forms under wallpaper at indoorhumidity.com.