
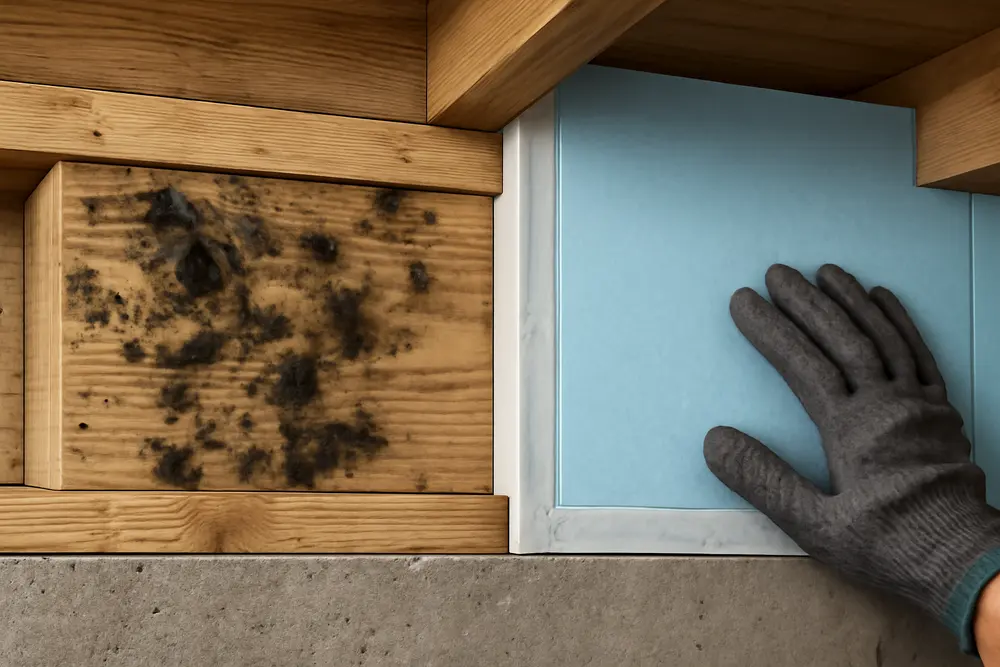
You found fuzzy spots kissing the wood around your basement ceiling and now the floor feels colder than your ex’s heart. That is classic rim joist mold. The fix is not more fiberglass and a wish. You need smart diagnostics, airtight crack sealing, and vapor-smart insulation that keeps the wood warm and dry. Here is how I handle it in homes with real-world humidity swings and drafty framing joints.
Why Rim Joists Mold
Rim joists sit on top of the foundation and touch the great outdoors through a whole lot of wood and fasteners. That setup is a thermal bridge that makes the interior face of the rim cold during cool weather. When indoor air with decent humidity touches that colder surface, it condenses. Add a few unsealed gaps around plumbing, wiring, and the sill plate, and you have a wet edge where mold loves to camp. Old fiberglass batts make it worse because they do not stop air and they sag, hide growth, and keep the wood cold.
If you like proof, an infrared camera lights this up like a crime scene. Cold bands at rim bays, darker spots at corner joints, and fastener heads that print through the sheathing are the usual suspects. We use IR paired with a moisture meter so the pretty colors line up with real moisture. See how we use IR to catch thermal bridging and leaks here Infrared Exposes Thermal Bridging Mold. Persistent indoor humidity just keeps feeding the problem, and yes, climate swings are making that a year-round game in many markets. More on that here Humidity And Climate Change Water Damage Risks.
What Are The Red Flags?
Start with your nose. Musty air near the outside edges of the basement or crawlspace is a giant hint. Look for speckled staining on the rim joist, sill plate, and subfloor edge. Feel for cool floors above exterior walls. Catch condensation on cold mornings or during winter cold snaps. If you own an IR camera, scan the band around the foundation at night when the outside air is cooler. Confirm with a moisture meter. Wood hanging out above 16 percent moisture is flirting with trouble, and above 20 percent you are in the danger zone for decay if it stays that way.
How Do You Check Condensation Risk?
Grab a hygrometer and an infrared thermometer or your IR camera. Note the room temperature and relative humidity, then check the rim joist surface temperature. If the surface is at or below the dew point for that indoor air, you will get condensation. Example time. Basement air is 70 F at 55 percent RH. Dew point sits near 54 F. Your rim joist reads 50 F. That surface will sweat, then mold follows. Fix is to raise that surface temperature and cut the air leaks that drive cold air across it.
Safe Cleanup That Actually Works
Do not seal in the problem. Clean it first. Set light containment with plastic so you are not fogging the whole house with spores. Wear PPE and run a HEPA air scrubber if you have one. Pull out soggy or moldy fiberglass. Vacuum loose growth with a HEPA vac, then wash wood with detergent and water. Follow with an EPA registered disinfectant that is approved for porous building materials. Let the wood dry until it is back near normal moisture readings before you seal anything. Painting over active mold does not fix it and usually makes the next job worse. We have a whole piece on why cover-ups fail here Infrared Exposes Thermal Bridging Mold. If the affected area is large or the framing is soft or rotted, bring in a licensed remediation crew.
Air Sealing That Stops Leaks
Air leaks are jet fuel for rim joist mold. Start at the sill plate to foundation joint. If there is no sill gasket or it is brittle, run a high quality sealant along that seam. Hit every wire, pipe, and fastener hole with low or medium expanding foam. Seal the joint where the rim joist meets the subfloor. Use backer rod for bigger gaps then seal. The goal is simple. Make the rim bays behave like the rest of the wall. Fewer drafts, fewer cold surfaces, less condensation. We often combine cut-and-cobble rigid foam with perimeter sealing or go straight to closed-cell spray foam that does air and vapor control in one shot. Here is a primer from our field notes Infrared Exposes Thermal Bridging Mold.
What Is Vapor-Smart Insulation?
Vapor-smart insulation makes the wood warmer while managing water vapor so you do not trap moisture where you cannot see it. Closed-cell spray foam is the classic choice at rim joists because it is an air barrier and a low-perm vapor retarder in one material. Rigid foam boards like polyiso or XPS also work if you cut them snug and seal all seams and edges. Open-cell foam and bare batts let vapor pass and do not stop air well, so they need extra layers to make the assembly behave. Building Science has long flagged rim joists as critical seal locations where spray foam shines. Read their guidance here Critical Seal Spray Foam At Rim Joist.
Retrofit Plan You Can Follow
Start with a clean slate. Remove damp insulation and scrub the wood. Dry it down. Seal the cracks at the sill plate, rim edges, and penetrations. Now bring the heat to the surface. If you choose closed-cell foam, two inches is a common sweet spot that delivers air sealing and low permeance in many climates, though follow your local code for R-value. If you go rigid board, cut each piece to fit tight, then seal its perimeter with can foam and tape the seams. Either way, keep the interior side airtight so humid room air cannot sneak behind it. Check whether your jurisdiction wants a thermal barrier or ignition barrier over exposed foam. Finish by balancing indoor humidity. Keep summer RH near or below 50 percent and in colder months aim for 30 to 50 percent. If the basement is stubborn, add a dehumidifier or turn up balanced ventilation.
Material Options Compared
| Material | R Per Inch | Air Barrier | Vapor Control | Use At Rim Joist |
|---|---|---|---|---|
| Closed-cell spray foam | R-6 to R-7 | Yes | Low perm | Excellent one-step air and vapor control |
| Rigid foam board | R-4 to R-6 | Only if sealed | Low perm when taped and foamed | Strong if seams and edges are tight |
| Open-cell spray foam | R-3.5 to R-4 | Yes | Vapor open | Needs extra vapor control in many climates |
| Fiberglass or mineral wool | R-3 to R-4 | No | Vapor open | Poor choice without an air and vapor layer |
For code notes and step-by-step basics, this page is a handy refresher Insulating And Sealing Rim Joists.
Verify And Monitor
We like to trust but verify. After insulating, run another IR scan. The band that was dark and cold should now be boring and uniform. Check a few wood spots with your moisture meter a week later. Watch indoor RH across a couple of weather swings. If it creeps up, fix the source or add dehumidification instead of guessing. Take a quick look each season at a few rim bays. Early checks beat later repairs.
Field Example That Proves The Point
One of our Austin clients had a 1998 build with rim joist mold behind sagging fiberglass. Winter cold front hits, basement air sits at 68 F and 58 percent RH. Dew point about 53 F. The rim read 49 F on IR and 19 percent moisture on a pin meter. We set light containment, removed the batts, HEPA vacuumed, cleaned with detergent and an EPA registered cleaner, and dried it with a focused setup. We then sealed the sill plate and penetrations, and installed 2 inches of closed-cell spray foam in each rim bay. Post work IR showed surface temps riding within 2 degrees of room temp. Wood moisture dropped to 11 to 13 percent within two weeks, and the musty smell left the chat.
FAQ
Can I keep my fiberglass if I add a vapor barrier?
Not at the rim. Fiberglass does not stop air. Air carries vapor. You would be asking a screen door to hold water. Use a true air barrier like spray foam or rigid foam that is fully sealed.
Will bleach fix rim joist mold?
Bleach is not great for porous wood and it can leave behind water that soaks the fibers. Use HEPA vacuuming, detergent and water, and an EPA registered disinfectant made for building materials. Dry it fully before insulating.
Is closed-cell spray foam the only answer?
No. Cut-and-cobble rigid foam with excellent air sealing also works. The key is airtightness and smart vapor control. Pick the combo you can install correctly and that meets local code.
How thick should the foam be?
It depends on climate and code. In many mixed climates, 1.5 to 2 inches of closed-cell foam gives solid vapor control. For rigid foam, hit your code R and make sure every edge and seam is sealed tight.
What if the rim is wet from a leak?
Fix the leak first. That includes exterior drainage, plumbing drips, or HVAC condensate issues. Insulation does not fix liquid water and will just trap the problem.
When To Call a Pro
If the growth is widespread, the wood is soft, or you see signs of structural damage, bring in a licensed remediation contractor. If you want the diagnostics done right the first time, hire a team that runs IR imaging with moisture verification and understands how air sealing and vapor-smart insulation work together. We are happy to inspect, show you the cold spots, and build a retrofit plan that holds up when the weather gets weird.