Adding solar should not come with attic stains or ceiling bubbles. Yet new mounts, conduit entries, and junction boxes can create hidden water paths if they are not flashed and sealed the right way. As Austin based water damage pros, we see what happens when rain meets shortcuts. This guide shows how proper flashing, PV conduit penetration sealing, smart wiring choices, and post install checks keep water out. You will also see what the codes require, which products solve common leak points, and how to protect your roof warranty. If you need a trusted Austin water damage pros team on call, meet us at trusted Austin water damage pros.
Where Solar Roof Leaks Start
Every hole through the roof deck is a potential leak path. Solar hardware adds several. The usual suspects are mount lag bolts that pierce shingles and underlayment, plus the conduit and junction box entries that route wiring off the roof. If any part of this system sheds water poorly, rain finds a path. Wind driven rain makes it worse.
Mounts are fastened through the finished roof into structural framing. If the pilot hole is not backfilled with the right sealant, if the flashing does not sit in the correct shingle layer, or if the lag is over torqued, water can bypass the shingle field. Do not rely on caulk as the primary barrier. Use a flashed attachment that sheds water by design. This matches best practice guidance from roofing resources and installer training. The U S Department of Energy Building America Solution Center shows that roof penetrations must be flashed with compatible materials and correct layering. Caulk alone is not a long term water control method. See guidance at the Building America resource guide on flashing penetrations for existing roofs at basc.pnnl.gov.
Conduit and junction boxes add more paths. Rain runs along conduit. Wind can push water uphill under a flashing if the entry is not elevated and sealed with the correct EPDM boot or aluminum cone system. The electrical code also treats the inside of rooftop conduit in a special way. The interior of above grade raceways in wet locations is considered wet. Conductors must be wet rated per 310.10 C. Boxes and fittings in wet spots must be listed for wet locations. See explanations at ECMweb and EngProducts NEC references.
Condensation also matters. Warm attic air can enter a cool exterior raceway. Moisture condenses inside the conduit then runs downhill into an enclosure or the attic. The National Electrical Code calls this out. Where raceways pass between different temperatures they must be sealed at that transition with a material identified for use with the conductors and insulation. That is NEC 300.7 A in plain words. See the Code Q and A on raceway management at ECMweb.
Code Corner NEC 300.7 A calls for a seal where the raceway crosses a temperature boundary. Ask your installer how they will seal the conduit at the attic entry to stop condensation.
Flashing That Works
Proper flashing is a system. Water must always shed over the flashing. Flashings must be compatible with the roof covering and underlayment. Use listed PV specific devices that come with clear install torque values and tested sealing hardware. New PV flashing devices are even covered under UL 2703A, which adds confidence in product testing and life. See more at the IronRidge FlashFoot page at ironridge.com.
Asphalt shingles
On shingle roofs, choose a listed flashed mount built for PV. Two strong options are IronRidge FlashFoot and EcoFasten GF 1. These use a deck level flashing that slides under the upslope shingle course. The pilot hole gets backfilled with a sealant that is compatible with the deck and the hardware. The EPDM bonded washer compresses under a set torque so the seal is repeatable. The flashing routes water over the shingle below, not into the mount hole. See the FlashFoot resources at ironridge.com. The GF 1 install manual shows the pilot hole backfill, fastener compression with EPDM washer, and the single fastener flashed detail. See the GF 1 manual at device.report or visit EcoFasten at ecofastensolar.com.
Do not count on beads of caulk as your primary defense. Sealant complements a flashing system only. Trade guidance stresses this. See Solar Power World on water intrusion control at solarpowerworldonline.com.
Tile roofs
Clay and concrete tile require double flashing. Place a sub flashing at the deck level below the tile. Then place a top flashing at the tile level. For conduit use a spun cone flashing with an EPDM collar sized to the conduit. Avoid grinding huge notches in tiles. Large openings expose underlayment and invite leaks. Double flashing protects the deck layer where water actually runs. See tile conduit flashing options such as QuickMount or similar products through distributor pages like Solarflexion at solarflexion.com. Product listings also appear at Ecodirect at ecodirect.com.
Membrane roofs
Low slope roofs demand a different approach. Old style pitch pans filled with mastic fail over time. Use a curb system designed for membrane roofs. Chem Link E Curb or ChemCurb builds a structural curb around the penetration. The kit bonds to the membrane and creates a tall liquid tight barrier around conduit or supports. See the product at chemlink.com.
Standing seam metal
The best leak control is to avoid penetrations on this roof type. Rail or rail less systems that clamp to the standing seams let installers mount solar with no holes in the sheet metal. S 5 PVKIT offers this approach. No penetration clamps fit the seam profile and hold the panel frame or rails. See more at s-5.com.
Roof Type Matters
Asphalt shingles use deck level flashing with EPDM washers. Tile needs double flashing at deck and tile. Membranes call for curb systems such as E Curb. Standing seam metal works best with no penetration clamps.
Seal PV Conduit The Right Way
Wiring can bring water into the building if entries and terminations are wrong. A complete PV conduit penetration sealing plan covers the roof entry flashing, wet location wiring inside the raceway, temperature transition seals, and box fittings that shed water with drip loops.
Dedicated conduit entry flashing
Use a flashing engineered for conduit. An aluminum cone with an EPDM collar creates a tight seal at the pipe. The flashing slides under the upslope shingle course so water sheds correctly. IronRidge QuickMount’s conduit penetration flashing is a strong example. The all aluminum cone and EPDM collar pair with standard roofing best practices. See product details at ironridge.com.
On composition shingles, a flashing integrated junction box can remove guesswork. SnapNrack FlashBox provides a roof integrated J box that seals the roof entry point while also housing the conductor splices. See the comp shingle roof solutions at snapnrack.com.
Rubber collars need care during install. Chamfer the pipe or conduit end so the sharp edge does not cut the EPDM boot. Avoid petroleum based products on rubber. These tips come from Oatey roof flashing guidance at oatey.ca.
Seal at temperature boundaries
Condensation is a silent source of water. Warm attic air rises into a cool rooftop raceway at night. Moisture condenses within the conduit. That water then drains into a junction box or the attic. NEC 300.7 A addresses this. Seal the raceway where it moves from warm interior zones to the exterior. Use a material identified for use with the conductor insulation. Generic foam is not a solution unless it is listed for this purpose and accepted by the Authority Having Jurisdiction. See the code Q and A at ECMweb.
Code Corner Seal the raceway at the attic to exterior transition. This stops warm moist air from pumping into cool conduit and condensing.
Wet rated wire and boxes
Rooftop conduit is a wet environment on the inside. NEC 300.9 says above grade raceways in wet locations are considered wet. Use conductors marked for wet locations per 310.10 C. Boxes and fittings in wet locations must be listed for wet use. NEMA 3R or 4 housings are common. Install them with raintight hubs or fittings. Arrange the interior so water does not pool. NEC 314.15 allows listed drains in boxes where needed. See code references at ECMweb and The NEC Wiki.
Drip loops and entry fittings
A simple drip loop can prevent a soaked enclosure. Route the cable so it drops below the box entry then rises up into the fitting. Water follows gravity and drips off the low point. At equipment entries, use listed raintight fittings or hubs that match the enclosure rating. A Myers hub is a heavy duty threaded option for some enclosures. Raintight compression connectors are common on thinwall conduit. The goal is a listed wet location seal that sheds water. See wet location box and fitting notes at EngProducts NEC references.
Quick Tip Raceways above grade in wet locations are wet inside. Choose wet rated conductors and fittings from the start.
Roof and Warranty Tips
Roof codes set a clear duty. The International Residential Code section R903 requires flashing to prevent moisture entry at roof openings and intersections. Follow the roof manufacturer instructions as the governing standard. See a summary of flashing duty at JLC Online.
In high wind zones or where wind driven rain is common, use detailing from IBHS Fortified guidance for steep sloped roofs. Extra care at edges and penetrations pays off when storms move through Central Texas. See Fortified technical documents at fortifiedhome.org.
Protect your roof warranty
Many roof warranties require flashed penetrations by qualified roofers. Sealant beads do not protect your coverage. Integrated PV flashing reduces disturbance of shingle seals, which helps long term performance. Coordinate with the roofer before the solar work starts. Document the roof condition with photos. Ask for written warranty steps from both the roofer and the solar installer. Trade guidance supports this approach. See Solar Power World on contractor coordination at solarpowerworldonline.com.
Start with a clean bill of health. If you plan a new array in Austin, schedule a roof check and simple upkeep before the install. You can use our roof inspection tips to prevent leaks to guide that visit.
Inspection and Maintenance
Once the system is live, your job shifts to quick checks after storms and routine roof care. Small signs found early prevent big repairs later.
After storms
Look inside first. Scan ceilings and upper walls for new stains or bubbling paint. A faint musty odor near the top floor can also signal moisture. If you see any of these signs, read our simple action guide on what to do if you spot stains or bubbling paint.
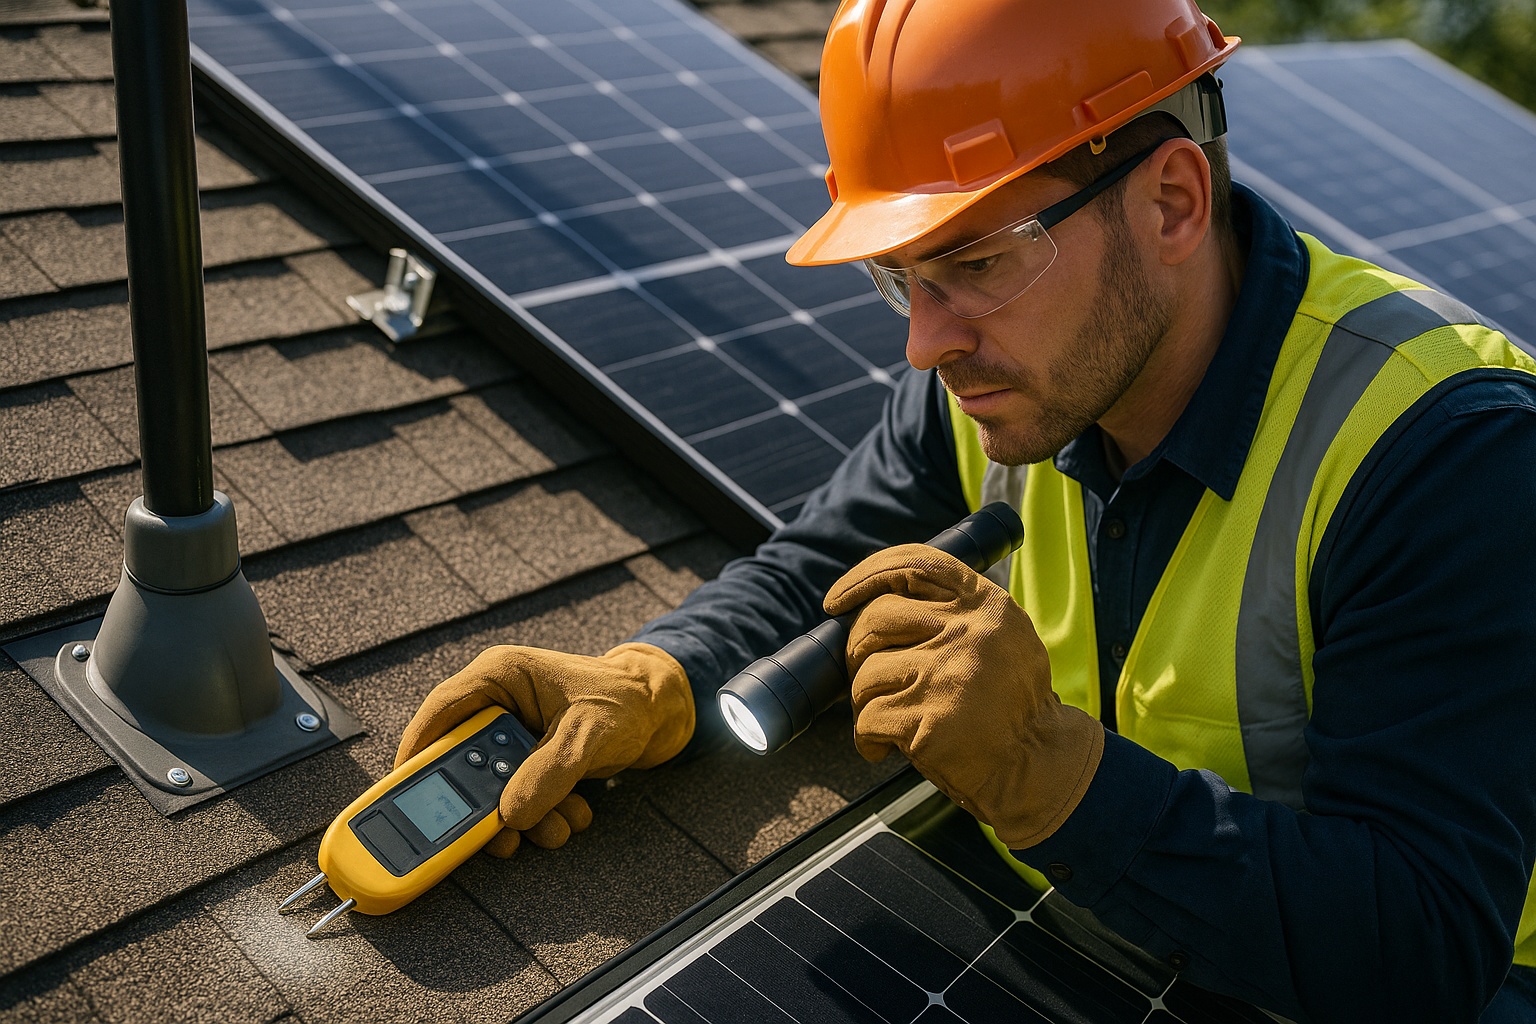
Check the attic within a day after a heavy rain, especially after the first big storm following install. Use a bright flashlight. Focus under conduit penetrations and around each mount location. Look for darkened deck, damp insulation, or shiny hardware. Our post on attic safety and leak checks walks through the process. Start with check your attic after heavy rain. For a shorter punch list, save this post on attic leak warning signs.
From the ground, scan the roof rows. Look for lifted shingles near rail feet. Watch for loose or rattling conduit. Check for staining around exterior junction boxes after a storm. Do not walk the roof. Call for an inspection if anything looks off.
Seasonal care
Clean gutters so water does not back up under shingles. Confirm downspouts move water away from the foundation. This protects both roof edges and the structure during intense Austin storms. See our guide on grading for a safe yard slope at keep water away from the foundation during storms. For broad prevention tips, bookmark our roof care post at roof inspection tips to prevent leaks.
How to check your attic after a storm
Go up with a light. Work from the access point toward the roof area under the array. Look for damp or matted insulation. Touch only with a glove. Follow any drip trails on rafters until you find the highest wet point. Note the time since the last storm. Take photos. If you see moisture, call a pro. Dry out starts the clock on mold prevention.
If You Find Moisture
Move fast. Water in an attic spreads across insulation then into ceiling drywall. That can lead to sagging paint and mold growth. Shut down any attic powered fans if ducting near the leak is wet. Do not start cutting without a plan. Photograph the damage. Capture wide shots that show location and close ups that show the condition at mounts or conduit entries.
Call a restoration team with solar roof experience. We can set containment, extract wet insulation, and set targeted drying. We work with your installer and roofer to stop the source. If you are in Central Texas and need emergency service now, reach us at 24/7 water damage help in Austin.
Action Steps You Can Take
Before install, schedule a roof inspection. Repair brittle shingles or torn underlayment. Ask your solar contractor which listed flashing devices they will use for mounts and conduit. Request datasheets for FlashFoot, EcoFasten GF 1, and SnapNrack FlashBox. Confirm where they will seal the raceway at the attic entry under NEC 300.7 A. Ask which wet rated conductors and wet location boxes they plan to use per NEC 300.9 and 314.15. If your roof is standing seam metal, ask about no penetration clamps like the S 5 PVKIT.
After install, take photos of every mount and penetration. Save all product and warranty documents. After the first heavy rain, inspect your attic and ceilings. If you find damp materials, follow our quick guide for early action at what to do if you spot stains or bubbling paint. Schedule annual roof checkups. Keep gutters clear so edges stay dry.
Quick Answers About PV Leaks
What causes roof leaks after solar installation
Most cases trace back to poor flashing at mounts or conduit entries. Over torqued lags, missing pilot hole backfill, or flashings placed in the wrong shingle layer let water bypass the roof system. Conduit and junction boxes also leak when fittings are not rated for wet locations or when there is no drip loop. Condensation can also form inside a raceway if the attic to exterior transition is not sealed per NEC 300.7 A. Treat above grade raceways in wet locations as wet on the inside per NEC 300.9. Use wet rated conductors per 310.10 C. Boxes and fittings in wet locations must be listed per 314.15. See code guidance at ECMweb.
Do I need special flashing for PV conduit
Yes. Use a dedicated conduit penetration flashing with an EPDM cone or collar that fits the conduit diameter. The flashing must slide under the upslope shingle course to shed water. A flashing integrated junction box such as SnapNrack FlashBox can also provide a clean, tested roof entry. See conduit flashings at ironridge.com and integrated J boxes at snapnrack.com.
Is sealant alone enough around PV mounts
No. Sealant is not a primary water barrier for roof penetrations. Use a listed flashed mount that sheds water by layering with the shingles. This also protects roof warranties. See the trade guidance at Solar Power World.
How do I stop condensation in PV conduit
Seal the raceway where it crosses from the attic to the exterior with a material identified for use with the conductors per NEC 300.7 A. Create drip loops at box entries. Use listed wet location boxes and fittings that can drain if needed. See code discussions at ECMweb.
Are raceways on the roof considered wet inside
Yes. Above grade raceways in wet locations are considered wet on the inside per NEC 300.9. Use wet rated wire per 310.10 C. Use boxes and fittings listed for wet locations per 314.15. See accessible code explanations at ECMweb.
Who Fixes Damage And Who Pays
Leak source repair often involves three parties. The roofer addresses flashing and roof covering issues. The solar installer addresses PV hardware and conduit entries. A restoration team dries materials and documents damage for insurance. Work with contractors who communicate well. Codes set minimums. Manufacturer instructions and roof warranty documents often set a higher bar. To protect coverage, keep all documents and photos. Ask for written statements on repair steps. If you are in Austin and spot trouble after your array goes live, call us for a fast assessment. We offer 24/7 water damage help in Austin.
Why this matters in Austin
Gulf moisture feeds fast moving thunderstorms here. Roofs see wind driven rain that tests every flashing. Heat adds another challenge. Hot attics push moisture into cool conduits at night. Then the next afternoon bakes sealant that was never designed to be the primary water control. Solid flashing and correct conduit sealing beat our local conditions. If you want a simple plan for how to stop solar panel roof leaks in Austin, use PV specific flashed mounts, a dedicated conduit flashing or integrated J box, seals at attic to exterior transitions per NEC 300.7 A, and listed wet location boxes and fittings. Add a quick interior check after the first hard rain. Call us if you see any sign of moisture.
Product and code highlights
Several devices simplify a leak free design. IronRidge FlashFoot and EcoFasten GF 1 for shingle mounts come with clear instructions and long warranties. Conduit entries benefit from IronRidge QuickMount conduit penetration flashing or SnapNrack FlashBox. For flat membrane roofs, Chem Link E Curb forms a durable curb around the penetration. For standing seam metal, S 5 PVKIT clamps remove the need for deck penetrations. New UL 2703A listing for PV flashing devices adds confidence in long service life. Use EPDM collars sized to the conduit, plus butyl or compatible sealants where the manufacturer requires it. Always follow the datasheet.
On codes, three sections steer most of the electrical decisions. NEC 300.7 A for temperature transition sealing. NEC 300.9 for the wet nature of rooftop raceways. NEC 314.15 for wet location box listing and drainage options. On the roof side, IRC R903 sets the flashing duty at penetrations and intersections. The DOE Building America Solution Center provides a quick picture of proper flashing layers for existing roofs. IBHS Fortified guidance puts a finer point on wind driven rain details that matter in storm zones.
Do not rely on caulk Sealant supports the flashing system. It does not replace it. Roofer involvement protects your warranty and sets you up for a dry attic.
A final word from your local restoration team
Solar saves energy for decades. It should not cost you a ceiling repair after the first big storm. Use listed flashing mounts that shed water. Use PV conduit penetration sealing that stops both rain and condensation. Treat rooftop raceways as wet inside, with wet rated conductors and listed wet location boxes and fittings. Create drip loops. Seal the raceway at the attic boundary. Photograph every penetration after install. After the first heavy rain, check the attic. If something seems off, call Austin Hi Tech Restoration. We respond fast. We dry soft materials before they turn into a bigger problem. We also coordinate with your roofer and installer, so your roof gets fixed the right way.
If you want more prevention tips beyond PV projects, see our guides on roof inspection tips to prevent leaks. If a storm just passed and you want to know what to look for inside, read check your attic after heavy rain. If you want a quick list of warning signs, save attic leak warning signs. If you see water right now, go straight to what to do if you spot stains or bubbling paint. When you are ready for service, call us anytime at 24/7 water damage help in Austin.