
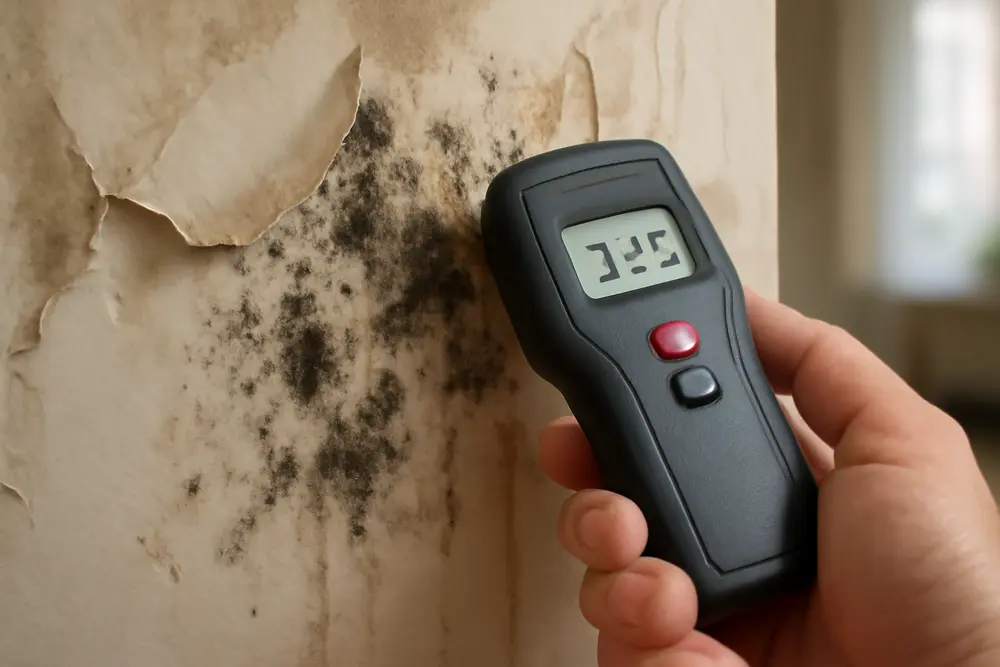
If your walls smell like a wet gym bag and your vinyl wallpaper has started to bubble like a bad sunburn, there is a good chance you have a secret garden of mold trapped behind it. Vinyl and heavy paper wall coverings can act like a one-way raincoat. Moisture gets in from a leak, condensation, or a steamy bathroom, then can’t escape. The result is mold chewing through paper backing and drywall while you admire a perfectly smooth pattern of lemons. Good news though. You can spot hidden issues early with moisture meter testing, confirm it without tearing the whole room apart, and remove, dry, and seal it right so it does not come back.
Why Wallpaper Hides Mold
Wallpaper and many modern adhesives are not just pretty. They can be surprisingly low-perm which means moisture moves through them very slowly. That is fine until a pipe sweat line behind the wall or a minor roof leak raises the wall’s moisture. Now you have damp paper on the back side of the wallpaper and gypsum facing that stays wet long enough for mold to move in.
Vinyl wallpaper is the biggest offender. It is practically a vapor barrier. Bathrooms, exterior walls in humid climates, and shaded north-facing walls are classic hotspots. Austin and Central Texas see this a lot thanks to sticky summers and big temperature swings that push condensation into wall assemblies. When humid air meets a cooler wall surface behind vinyl, that moisture can linger. The EPA has long warned that trapped moisture behind wall coverings creates a perfect setup for hidden mold growth behind finishes like wallpaper. You can read their remediation guide for the bigger picture at the EPA site.
Adhesives can play a role too. Some pastes and clear acrylic glues stay slightly tacky and can absorb moisture. That sticky, organic film is basically a snack bar for mold spores that were already in the air waiting for a damp landing pad.
Early Warning Signs
Hidden wallpaper mold does not usually announce itself with green polka dots. Instead you get subtle flags that your wall is sweating in silence. A steady musty odor when you walk into a closed room is the first clue. Bubbling or peeling edges near seams or corners are another. Discoloration that looks like faint tea stains creeping through the paper can show up as well. If a wall patch feels cooler or softer than surrounding areas, that is worth attention. Those signs line up with what multiple industry guides call out as red flags, including Austin Hi-Tech’s hidden water damage guide and BioRestore’s breakdown of mold behind walls.
Exterior walls behind big furniture are also frequent trouble spots. The sofa blocks airflow and the wall stays cooler. Humid interior air condenses behind the piece and you end up with wallpaper that starts to lift. If that sounds familiar, keep reading.
Confirm Without Demolition
Here is where moisture meter testing proves its worth. A moisture meter does not sniff mold, but it does show you whether the material is too wet and likely supporting growth. Pros carry them daily because they help find hidden water before paint peels, as noted in Austin Hi-Tech’s resources on hidden water damage and post-flood drying.
You have two main flavors of meters. Non-invasive meters read through finishes using an electromagnetic field. They are fast and do not leave pinholes. That makes them great for a first pass over wallpaper. Pin-type meters use two probes that you press into the surface for a direct reading. Pin meters can be more precise in wood and drywall cores, but you do need to make tiny holes. With wallpaper, that usually means testing in a discreet spot like behind a switch plate cover or low behind a baseboard heater trim.
Thermal cameras are a strong teammate too. They can show cooler areas that hint at wet insulation or condensation patterns. They are not proof by themselves, but when you see a cool streak that matches an elevated moisture reading, you have a story. Quick peeks by removing an outlet cover can also reveal musty odor, darkened paper backing, or corrosion that screams hidden moisture, all without ripping a full wall.
Moisture Meter How-To
Start with a dry reference. Choose an interior wall away from kitchens, baths, and exterior exposures. Take three readings and average them. That is your baseline for this house and this day’s humidity. Then sweep suspect areas methodically, moving the meter in a grid pattern. Look for numbers that jump above baseline by a meaningful margin. Pay attention to seams, corners, shower-adjacent walls, and exterior walls behind large furniture.
Set your meter correctly for the material you are testing. Finish layers can throw readings off, and wallpaper adhesives can skew some non-invasive meters. Check your model’s manual or a reliable buying guide that explains calibration and modes for drywall, plaster, and wood. MoldActionPlan and InterNACHI both have solid walk-throughs that explain why a correct setting matters.
For wood framing, the common rule of thumb is simple. Wood moisture content over roughly 15 to 20 percent is a problem and mold risk climbs fast around 20 percent. InterNACHI and BioRestore echo that threshold. For drywall, many meters provide a comparative scale rather than a true percent content. That is why your dry baseline is key. If an area of drywall reads significantly higher than your interior control readings, treat it as wet.
The bottom line. Non-invasive meters can read through wallpaper, especially thin paper. Heavy vinyl and metallic or foil wallpapers are trickier. If your readings are inconsistent or if the finish is thick, confirm with a pin meter in a discreet test area or remove a small section of paper at a seam and test the substrate directly.
Safe Removal Steps
If your testing points to moisture and likely mold, you need to open the system, but you can do it in a controlled way. Suit up first. Wear an N95 or better respirator, nitrile gloves, and goggles. Long sleeves are smart. Set basic containment. Close doors, lay plastic on the floor, and if you have a box fan and a window, you can create crude negative pressure by blowing air out so spores do not ride dust into the rest of the home.
Score a small test square in a corner or near a seam. Mist the paper lightly with warm water to soften paste and reduce dust. Pry a corner and peel slowly. If you see black or dark spotting on the paper backing or the drywall face, pause and reassess scope. If the affected area is larger than about 10 square feet, or if anyone in the home has respiratory issues, the EPA recommends calling a professional. Bigger jobs are not just more of the same. They need better containment, HEPA filtration, and more thorough cleaning to keep spores from spreading around the home.
For manageable spots, remove all loose wallpaper until you reach edges with clean, firmly bonded paper. Bag removed paper immediately. If drywall paper facing is stained, soft, or crumbles, cut out the compromised drywall. Anything that is waterlogged or shows heavy mold staining on the paper face must go. Insulation behind a moldy section should be inspected. If it is damp or musty, remove and bag it too. Austin Hi-Tech’s hidden damage guide aligns with this. Porous materials that have been compromised are not worth saving.
Hard, non-porous surfaces like metal corner bead, ceramic tile, or sealed trim can be cleaned. Use a standard detergent solution or an EPA-registered cleaner suited for mold cleanup. Bleach is not a universal fix. It does not penetrate porous drywall and it leaves a lot of water behind. Never mix cleaning products.
Finish this phase by HEPA vacuuming the open stud bays, the floor area, and surrounding surfaces. Then wipe those same surfaces with your cleaning solution. Cleaning first and then drying is the right order. Drying dirty materials just glues spores in place.
Drying That Actually Works
After removal and cleaning, get the moisture out fast. Bring in a dehumidifier and set it to pull the room down to around 40 to 50 percent relative humidity. Add air movers or plain fans to keep air moving across open wall cavities. Crack a window if the outside air is drier than inside. If the humidity outside is high, keep windows closed and let the dehumidifier do the work.
Now verify with your meter. Take readings on studs, plates, and exposed drywall edges. Log your numbers once or twice a day. You want to see a steady drop that levels off near your dry reference readings. In a typical small bathroom, cleaned and opened up, light drying can take 24 to 72 hours. Heavier water exposure or thicker assemblies can take a week or more. Do not rush the next step. Sealing wet framing traps moisture and invites repeat growth.
Austin Hi-Tech’s flood dry-out guide is clear on this. Use meters to confirm you are truly dry, not just warm and breezy. That is how you avoid repainting over a problem that pops back through next month.
Seal It Right
Once your moisture readings are back to normal and stable for at least a day, you can close things up. If stains remain on framing or the cut edges of drywall, spot prime with a stain-blocking primer. For finished surfaces, choose a primer and paint system that breathes. Latex paints with higher perm ratings let any seasonal moisture move through, which is helpful on exterior walls. Avoid installing new vinyl wallpaper on exterior walls, bathrooms, and kitchens unless you know the wall assembly has proper ventilation and continuous insulation.
If you are committed to wallpaper, choose a breathable paper and a paste that is designed to release and that does not form a plastic film. Ask suppliers for perm ratings or terms like breathable or vapor-permeable. Lower perm equals slower drying. Higher perm equals better drying potential. Pair that with good ventilation and you will drop your odds of a repeat show.
Prevent Regrowth
Mold is not magic. It needs moisture and time. Keep indoor humidity in the 30 to 50 percent range. An Austin summer can push you higher fast, so run the AC in dehumidify-friendly settings and use a stand-alone dehumidifier in damp rooms. Airoasis and many building science sources land on that 30 to 50 percent sweet spot for general control.
Fix small leaks early. A sweating supply line behind a sink base can feed the backside of dining room wallpaper through a shared wall cavity. Upgrade bathroom fans and make sure they actually vent outdoors. Let them run for 20 minutes after a shower. Consider adding insulation or an air gap on exterior walls that run cold in winter. Move big furniture a couple of inches off exterior walls so air can circulate. If you repaint, keep the finish breathable, especially over new drywall repairs.
When Pros Should Step In
Call a professional when any of the following show up. The affected area is larger than a typical bath mat. That 10 square foot line from the EPA is a good threshold. The water source is still unclear or your moisture readings stay high even after a few days of ventilation. Someone in the home has asthma or heightened sensitivities. The mold is in an HVAC closet or near a return. You see repeated bubbling coming back after a previous repair. Or you are uncovering multiple layers of wallpaper with mystery adhesives that smell like the 1970s. Pros bring containment, negative air machines, larger dehumidifiers, thermal imaging, and the ability to fix the source while rebuilding to save you a second round.
A Quick Case Study
We answered a call in a mid-century place off Burnet where the dining room smelled like old books. The vinyl wallpaper looked perfect. The moisture meter said otherwise. A non-invasive pass over the exterior wall showed readings two to three times higher than the interior baseline. Thermal imaging showed a cool band along the top plate. We popped one seam near a corner, and there it was. Black speckling on the paper backing and soft drywall under the crown. We set simple containment, removed a six-foot run of wallpaper and the compromised top strip of drywall, HEPA vacuumed, and cleaned the framing. Readings started high on day one, then dropped daily under targeted dehumidification. By day three, studs were at safe levels and the new drywall patch went up. We finished with a breathable primer and paint, then pointed the owner to a roofer because a tiny flashing leak over the eave was the culprit. No more old book smell. No more hidden swamp.
FAQ: Moisture Meter And Mold?
Can A Moisture Meter read through wallpaper?
Often yes. Non-invasive meters can read through thin paper and some vinyl. Heavy vinyl, foil, or metallic inks can interfere. If readings are jumpy or inconsistent, confirm with a pin meter in a discreet spot or by lifting a small seam and testing the substrate directly.
What readings should set off alarms?
For wood framing, roughly 15 to 20 percent moisture content is considered high risk for mold. Around 20 percent is where growth becomes very likely. For drywall, compare to a known dry interior baseline. If a wall section is consistently higher than baseline and does not drop with ventilation, you have a wet wall that needs attention.
Do I have to pull down an entire wall of wallpaper?
No. Start small. Open at seams or corners near your highest meter readings. If you find moldy or soft drywall, expand until you hit clean, sound material in all directions. Patchwork is fine, but do not leave stained or spongy drywall edges in place. They tend to keep feeding growth.
What happens if I just spray something on top and call it a day?
You get round two. Spraying a biocide or bleach on intact wallpaper does not fix trapped moisture. Mold grows back as soon as the wall stays damp again. The only winning move is to remove damaged finishes, dry the structure fully, and then rebuild with breathable materials while fixing the moisture source.
Are breathable wallpapers and adhesives worth it?
Yes, especially on exterior walls and in rooms that run humid. Ask for vapor-permeable paper and paste. Avoid vinyl and foil in bathrooms, laundry rooms, and kitchens. Pair with a quality exhaust fan and you greatly reduce the odds of hidden growth.
How long should drying take and how do I know I am done?
Small, opened-up areas can dry in 1 to 3 days with a dehumidifier and fans. Heavier damage can take a week. You are done when meter readings match your dry baseline and stay there for at least 24 hours with normal indoor humidity. Do not rely on touch. Use the meter.
What PPE should I use for DIY?
Use an N95 or better respirator, gloves, goggles, and long sleeves. Set basic containment with plastic on the floor and keep doors closed. Bag debris before leaving the room. If the area is larger than 10 square feet or you feel outgunned, bring in a pro.
Field Tips That Save Time
Always check above and below suspect areas. Water loves gravity and framing paths. If the powder room wall is high, check the band at the ceiling and the baseboard line. Pop a switch plate. That one-minute move often gives you a whiff of the real story. Use painter’s tape to mark your grid and log meter readings with time and humidity. Trend lines matter more than single spikes. And never seal or paint anything the same day you clean it. Give the structure time to let go of moisture while you confirm with your meter.
Sources And Further Reading
Want to go deeper on wallpaper mold detection and moisture meter testing technique? Here are some solid resources:
Austin Hi-Tech Hidden Water Damage In Walls
Austin Hi-Tech How To Dry Out Your Home After A Flood
Austin Hi-Tech Humidity And Climate Change Water Damage Risks
InterNACHI Moisture Meters Overview
BioRestore Mold Behind Walls Detection
MoldActionPlan Moisture Meter Guide
EPA Mold Remediation In Schools And Commercial Buildings
Airoasis Is There Mold Behind Your Wallpaper