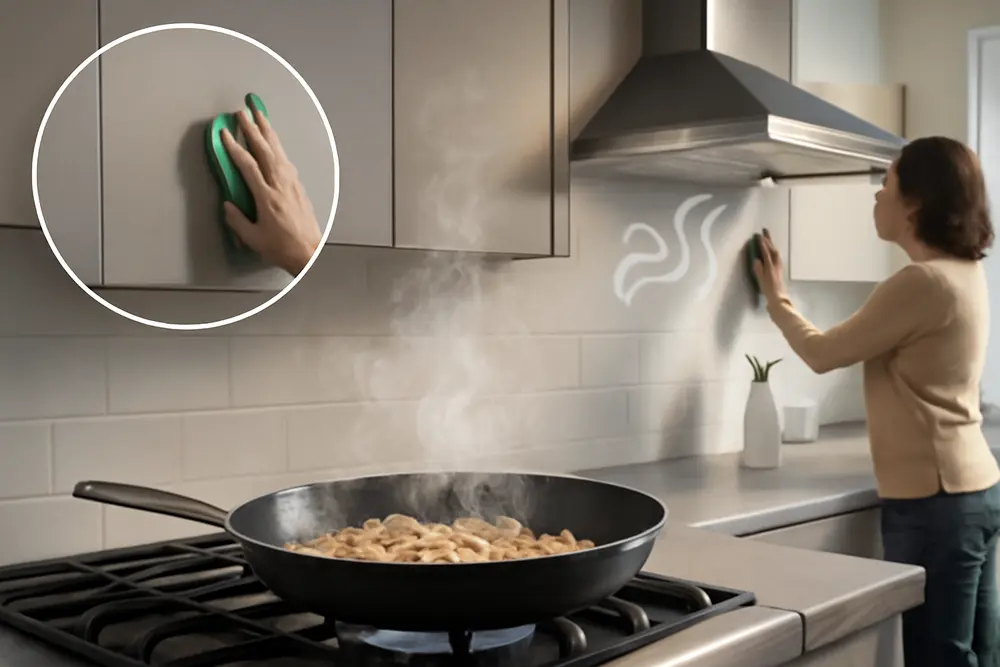
You burned chicken thighs on the stove and now your kitchen smells like a locker room that lost a fight with a smokehouse. The walls look clean. The cabinets look clean. Your eyes say it is fine, but your nose says absolutely not. That is invisible protein soot. It hides. It clings. It laughs at soap. As a restoration company that lives in this world, we cut through the stink with the right chemistry and the right sequence. If you want the smell gone for good, you need enzyme power, careful technique, and zero panic scrubbing.
Invisible Protein Soot Explained
Protein fires start with food, not wood. Meats, eggs, milk, and oils throw off a light-colored smoke when they burn. That smoke dries into a nearly clear, sticky film that rides your air currents and grips everything. You may spot a faint amber-yellow haze on white paint or glossy cabinets, but most of the time you will just smell it. The odor is sharp, rancid, and stubborn because you are dealing with cooked protein that bonded to surfaces.
Unlike fluffy black carbon from a paper or plastic fire, protein soot is a skinny film. It settles on high spots, hides on the underside of cabinets, tucks into range hoods, and lounges inside vents. It loves varnished wood, painted drywall, stainless trim, tile grout, and every texture in your backsplash. It is also hydrophilic in weird ways. Hit it with the wrong cleaner and it will smear like old sunscreen instead of lifting. That smear traps odor deeper into the pores of the surface. You think you cleaned. Really you just sealed in the smell.
It is also acidic over time, which means the longer it sits the more it etches finishes and discolors paint. That faint yellow cast on the ceiling near the kitchen is not a mood. It is damage loading up. Cleaning it one week later is harder than cleaning it day one. Cleaning it one month later can require primer and repaint after the cleaning stage. Some porous items will never release that odor if they get a late start.
Why Soap Smears Not Solves
Standard degreasers and soapy water are designed to lift oils and typical kitchen grime. Protein soot is a different beast. The smell lives inside long-chain protein molecules that baked onto your surfaces. Scrubbing with plain degreaser turns the residue into a cloudy smear. It can look better for a minute. Then the smell drifts back as the water evaporates because the protein bond is still there. Worse, hard scrubbing can force residue deeper into paint film and wood grain.
Here is a kitchen we see all the time. Salmon broils into a charcoal brick. The oven vents cook that protein fog onto the cabinet crown molding and the top of the fridge. Homeowner grabs hot soapy water and a green scrub pad. Result. Temporary shine, permanent streaks, and an odor that laughs its way through three candles and a bowl of coffee grounds. The fix requires enzyme chemistry that breaks the protein chains so there is nothing left to smell.
Another trap is painting over it. Fresh paint over unneutralized protein soot will not block the odor and can develop yellow bleed-through. You end up paying to repaint after the repaint. That is an expensive way to learn about residue you cannot see.
Cleaners And Tools That Work
Beating invisible protein soot is about sequence and touch. Start dry. Then go wet with the right chemistry. Then finish with odor control that treats the air and the hidden pathways.
Dry cleaning comes first. HEPA vacuum any loose dust, char, or cobwebs so you do not grind grit into finishes. Follow with chemical sponges, also called dry-cleaning sponges, to lift any residue that will transfer without moisture. Work top-to-bottom. Flip or trim the sponge as it loads up so you do not redeposit grime.
Now the wet stage. You are usually dealing with a two-part problem. Grease on the outside and cooked protein in the middle. A mild-to-moderate alkaline degreaser loosens the fatty layer so your enzyme can reach the protein. Then the enzymatic degreaser does the heavy lift on odor by breaking those protein bonds. Look for a product that lists protease on the label. Lipase and amylase can help with fats and starches, but protease is your star when the smell is protein-driven.
Use soft microfiber towels and soft-bristle brushes, not magic erasers or aggressive pads, because you do not want to abrade finishes and drive residue in deeper. Control dwell time by keeping the surface wet with solution long enough for the cleaner to work without letting it dry out. Rinse with clean water and change rinse water frequently so you are not mopping the same gunk around. Check pH with test strips as you go. After alkaline cleaners, your final rinse should land you near neutral so primers, paints, and sealers will bond correctly later.
How To Use An Enzymatic Degreaser
Enzymatic degreaser is not magic. It just feels like it when you use it right. Here is the playbook we teach new techs on day one.
First rule. Test a small, hidden spot. Painted cabinets and stained wood can be fussy. If the finish blushes or dulls, step down your alkalinity before you bring in enzymes. Second rule. Pre-clean with a light alkaline product so the enzyme is not stuck wrestling a grease shield. Grease breaks down best with alkalinity and surfactants. Protein breaks down best with enzymes.
Mix the enzymatic degreaser per label. Enzymes hate extremes. Warm is good. Hot can kill them. Room temp to mildly warm solution is your friend. Do not pair enzymes with bleach or strong disinfectants because those can denature the enzyme and waste your time. Apply the solution with a spray bottle or pump sprayer until the surface is evenly wet. Give it dwell time. Five to fifteen minutes is common, with light agitation from a soft brush or microfiber to keep the solution active. On verticals, re-wet lightly if you see it drying.
After dwell and light agitation, wipe off the lifted residue with clean microfiber. Rinse with clean water. Smell test the area. If you still catch a protein note, repeat the enzyme step rather than scrubbing harder. You are not trying to outmuscle it. You are trying to outsmart it with chemistry. Once odor reads clean, do a final rinse and pH test. Let the area dry, then reassess. It is normal to find high spots or hidden edges that need a second pass.
Pro tip. Textiles and kitchen soft goods hold protein odor like champs. Dish towels, oven mitts, curtains, and chair cushions often need laundering with an enzyme booster or a restoration-grade wash solution. If your nose says the kitchen still stinks after hard-surface cleaning, go hunt the fabrics and the HVAC filter next.
Deodorization That Actually Works
There is no point misting perfume in a smoke kitchen. Deodorization only works after you remove the source. That means surfaces, contents, and HVAC. Once you beat the residue with your enzymatic degreaser plan, you can treat the air and the places you cannot scrub.
HEPA air scrubbers pull fine particles and odor-laden aerosols out of the air. We size them to cycle the room air several times per hour and run them throughout cleaning. After cleaning, we keep them on to knock down the last stubborn odors as surfaces off-gas. For deep odor, we add a deodorization technology. Hydroxyl generators work in occupied spaces and are gentler on rubbers and electronics, but they are slower. Ozone works faster for some odor profiles, yet the space must be unoccupied and you need to protect sensitive items. Either way, you treat until the nose test passes after you air out the space.
Do not forget HVAC. Replace the filter. Clean or replace the range hood filter. Have a pro open the air handler cabinet if there is noticeable odor at the coil or insulation. If residue made its way into ductwork, plan a duct cleaning with appropriate methods, not a quick vacuum that just relocates the smell. It is common for an odor to seem gone until the first hot day when the AC kicks on and reheats residues hidden in the system.
On tricky jobs, we also use thermal fogging or cold fogging with a protein-targeting deodorizer after source removal. Thermal fog mimics the way smoke traveled so deodorizer reaches the same paths. It is not a cover scent. It is a final punch at remaining odor molecules. Sealers and odor-blocking primers are the last step for stained or etched surfaces, never the first step.
Mistakes That Lock In Odors
Waiting is mistake number one. The longer protein soot sits, the deeper it bonds and the more it yellows. Clean quickly. If life happens and you are at day seven, expect more time, stronger chemistry, and possibly cosmetic repairs after cleaning.
Scrubbing like you are buffing chrome is mistake number two. Aggression pushes residue into pores and scuffs the finish. Use soft tools, longer dwell, and repeat cycles instead of force. If a surface demands abrasion, that is a sign you need a different cleaner or it is time to call a pro.
Using regular soap only is mistake number three. It will not break protein bonds and can lock in odor. Skipping the enzyme step is how you end up sniffing cabinets three weeks later and questioning your life choices.
Painting over it is mistake number four. Paint does not stick right over unneutralized residue. It streaks and yellows. Odor bleeds. You repaint. Twice. Clean and deodorize first. Prime with the right stain-blocking primer after pH checks, then paint.
Hot steam cleaning can be mistake number five. Heat can set protein stains and cook the odor in. Enzyme cleaners like warm, not scalding. Keep it gentle.
Ignoring the ceiling, the tops of cabinets, the backside of door trim, and the HVAC path is mistake number six. Protein soot loves high spots, undersides, and hidden edges. Hunt those zones on your second pass or you will chase a phantom smell for days.
What A Pro Crew Does
When we roll up to a protein fire, we do not guess. We scope. That means we start with nose and light, then pH checks, then test cleaning on a few surfaces to dial in chemistry. We set containment if needed, run HEPA filtration, and protect unaffected spaces. We dry clean first with HEPA vacuuming and chemical sponges. Then we wash with a measured combo of alkaline degreaser and enzymatic degreaser, keeping dwell times controlled and tools soft. We rinse to neutral pH, verify with strips, and document each zone with photos and odor notes.
We chase the odor paths. Range hood and filters get cleaned or replaced. HVAC filter is out and new one is in. If the coil smells, we address it. Textiles are packed out and laundered with enzyme boosters or processed in a contents facility where needed. Non-porous contents get wet-wash or ultrasonic cleaning. We set hydroxyl or ozone based on the job and safety plan. After source removal, we fog if needed, then ventilate. If yellowing remains on paint or the finish is etched, we prime and repaint after cleaning. We write reports your adjuster can read without a chemistry degree.
Austin Hi-Tech Restoration handles this type of mess weekly across the Austin area. Our teams have the cleaners, the air tools, and the process to clear the odor without tearing your kitchen apart. If you think you have nothing there because you cannot see soot, we have news. Your nose is right. We are built for that.
DIY Or Call In Backup?
Go DIY if the fire was small, the residue is limited to one room, and you caught it in the first day or two. Expect to buy an alkaline kitchen degreaser, an enzymatic degreaser, chemical sponges, microfiber, soft brushes, pH strips, and a stack of clean towels. Plan for methodical passes and a half day of focused work. If the odor drops quickly and stays down after 24 to 48 hours with HVAC running, you likely nailed it.
Call a pro if the smell lingers after your first round of enzyme cleaning, if you see yellowing that will not budge, if you smell it in bedrooms far from the kitchen, or if it worsens when the AC runs. Also call us if you are dealing with high-end cabinetry, stone with open pores, or finishes that scare you. One wrong move can turn a cleanable finish into a refinish job. We can also handle the air treatment and any necessary fogging safely without leaving you out of your house longer than needed.
| Do | Do Not |
|---|---|
| Start with dry cleaning and HEPA vacuuming | Start with hot water and hard scrubbing |
| Use alkaline degreaser, then enzymatic degreaser | Rely on soap only for protein odor |
| Control dwell time and keep solutions warm | Use bleach or very hot solutions with enzymes |
| Rinse to neutral pH and verify with strips | Paint directly over unneutralized residue |
| Replace HVAC and range hood filters | Ignore HVAC and hope the smell fades |
Protein Soot FAQ
Why Does Protein Soot Smell So Strong?
Burned proteins create odor-rich molecules that stick to surfaces. They are not easy to see, but your nose is accurate. Until those protein chains are broken down with enzyme action, the smell keeps rebounding.
Do I Really Need An Enzymatic Degreaser?
Yes if you want the odor gone. An enzymatic degreaser targets the protein component that regular degreaser will not touch. You can knock down greasy shine with alkaline cleaner, but the enzyme step is what erases the stink.
Will Vinegar Or Baking Soda Fix It?
They can reduce some kitchen odors, but protein soot is not a fridge smell. Vinegar can help with pH on some surfaces, yet it will not break protein bonds. You will likely just add a salad note to your smoke problem.
Can I Ozone The House And Skip Cleaning?
No. Ozone or hydroxyl helps after you remove the source. If residue stays on the surface, the odor returns as soon as you air out. Clean first, then treat the air. That sequence matters.
How Long Should I Let Enzymes Dwell?
Most products want 5 to 15 minutes with light agitation. Do not let the solution dry on the surface. Keep it active and then rinse. Repeat light cycles instead of forcing one aggressive pass.
What If My Painted Walls Still Look Yellow?
If cleaning stops improving it, the paint film may be etched or stained. At that point, prime with a stain-blocking primer rated for smoke, then repaint. Always clean and neutralize before you prime.
Why Does The Smell Come Back When The AC Runs?
Your HVAC probably carried the odor during the fire and now reheats it. Replace filters, inspect the air handler, and consider duct cleaning if the odor is strong at supply vents. Treating the air without fixing HVAC will not hold.
Can I Save My Curtains And Cushions?
Often yes with the right wash chemistry. Wash with an enzyme booster or send them to a restoration laundry that uses specialized formulas and controlled temps. If odor remains after proper laundering, replacement may be cheaper than more attempts.
Still Smelling It After Cleaning?
If a fresh enzyme wash did not move the needle, you probably have hidden deposition on high spots, inside the range hood, or along HVAC paths. We can run a quick assessment, point out the hotspots you missed, and knock it out with pro-grade chemistry and air treatment. Austin Hi-Tech Restoration is happy to coach DIYers or take the whole job from sticky film to fresh air. When the soot is invisible, the plan cannot be.